Wednesday, December 22, 2010

Christmas Cookie Recap

My plan for today's post was Christmas Brunch, I even have a teaser on the side of the screen to lure you in.  Unfortunately, I've changed my mind.  I'll still give you the recipe link to the Eggnog French Toast-just ask in the comment section of this post, but I really think that one post doesn't do this brunch justice.  This brunch is very special to me and I feel it should be a special holiday edition much like the cookie series, so my apologies, but I hope you understand.

I hope you have enjoyed Baking for the Boys Christmas Edition, Inside the Cookie Box.  It is so nice to share favorite recipes, especially those you enjoy during this time of year.  I'd also like to wish everyone a safe, happy and healthy holiday season.  Merry Christmas and Happy New Year to all!


Monday, December 20, 2010

Inside the Cookie Box-Spice Cookies

OK.  I'm breaking the silence on my Monday cookie post.  Only to inform you about this cookie.  It is the most requested recipe from my repertoire.  So yes, I've saved the best for last.  I clipped this recipe when I was in high school, so I've had it for a long while.  Every holiday season I whip it out of the recipe box (it makes quite a bit) for cookies swaps or parties, and every year I'm asked for the recipe...so here it is!!!

They have a warm, gingery spice flavor and are so soft on the inside.  I think that is why people LOVE them, because they look look a ginger snap, have a crunchy exterior from being rolled in sugar and a surprisingly soft interior.  I bet you, like me, you'll make these every year.

***From the "Inside the Cookie Box" edition.


Spice Cookies
Yield: about 6 dozen
1 ½ cups unsalted butter
2 cups sugar
2 eggs
½ molasses
4 cups flour
4 teaspoons baking soda
2 teaspoons ground cinnamon
1 teaspoon ground ginger
1 teaspoon ground cloves
1 teaspoon salt

1. In a mixing bowl, cream butter and sugar. Add eggs, one at a time, beating well after each addition. Add molasses; mix well.
2. Combine flour, baking soda, cinnamon, ginger, cloves and salt; add to creamed mixture and mix well. Chill overnight.
3. Shape into ¾ oz. (1/2 inch) balls; roll in granulated sugar.
4. Place 2 inches apart on ungreased baking sheets. Bake at 375° for 7-8 minutes or until edges begin to brown. Cool for 2 minutes before moving to a wire rack.

Thursday, December 16, 2010

"Meatloaf, smeatloaf, double-beatloaf. I hate meatloaf."

Actually, I don't hate meatloaf at all.  My sister and I always loved that line from A Christmas Story and I'm sure we were guilty of chanting it just as my mother placed the meatloaf on the table.  It seems that people either love meatloaf or hate it, never do I hear, "Eh, its tolerable..."  Well, I have found one that is definitely lovable!

This meatloaf is truly great and has become our meatloaf of choice.  For years I had made Ina Garten's Turkey Meatloaf and decided to give this one a try.  Sorry Ina, this one has defeated you.  There is heat from the Srichacha and sweetness from the brown sugar in the topping, mushrooms give a nice texture and moistness and best of all (and like Ina's) it is a lighter version of meatloaf because it is turkey.  It is seriously good, so homey and perfect for chilly winter's night.
Spicy Turkey Meat Loaf with Ketchup Topping
yield: 8 servings

1 tablespoon butter
2 cups chopped onion
8 oz. cremini mushrooms, sliced
3 garlic cloves, chopped
¾ cup panko breadcrumbs
¼ cup low sodium chicken broth
1 ½ teaspoon dried thyme
1 tablespoon low sodium soy sauce
1 tablespoon Sriracha chile sauce
1 tablespoon Worcestershire sauce
½ teaspoon black pepper
1 ½ pounds ground turkey breast
1 large egg, lightly beaten
½ cup ketchup
1 tablespoon brown sugar
1/8 teaspoon dry mustard
1/8 teaspoon ground nutmeg

1. Preheat oven to 350°
2. Melt butter in a large skillet over medium heat. Add onion, mushrooms, and garlic to pan; cook 8 minutes, stirring occasionally. Remove from heat; cool 5 minutes.
3. Combine mushroom mixture, panko, and next 8 ingredients (through egg) in a large bowl; stir well to combine. Shape turkey mixture into a 9 x 5-inch rectangle on a foil lined pan coated with cooking spray.
4. Combine ketchup, brown sugar, mustard, and nutmeg in a small bowl, stirring with a whisk. Spread ketchup mixture evenly over top of meat loaf; bake for 40 minutes, or until a thermometer registers 160°. Let stand for 10 minutes before serving.
Print Me!!!

Monday, December 13, 2010

Inside the Cookie Box-Sugar Cookies

You can never go wrong with a Sugar Cookie.  So simple, delicious and perfect to decorate for the holidays

Sugar Cookies
½ cup butter, softened
1 cup sugar
1 egg
2 tablespoons milk
½ teaspoon vanilla
2 cups flour
½ teaspoon salt
½ teaspoon baking powder

1. Combine butter, sugar, egg, milk and vanilla and beat until light and fluffy. Combine flour, salt and baking powder in bowl. Mix well. Stir into creamed mixture slowly until mixed well. Chill dough thoroughly.
2. Roll small portions at a time on a well-floured board. Cut out cookies.
3. Sprinkle cookies with sanding sugar and bake at 375° for about 8 minutes.

***For more cookies from "Inside the Cookie Box" click here.

Thursday, December 9, 2010

The One That Almost Got Away (Pumpkin Cream Cheese Muffins)

I have to admit, nuts would make them more attractive...but the hubs does not like nuts!  Oh well!
This is a love story...about me...and a muffin.  Starbucks pumpkin cream cheese muffin to be exact.  I rarely walk in to a Starbucks, it really is a rare occasion.  But one brisk morning I found myself shoving my sons stroller into the store patiently awaiting for Pottery Barn to open...I had arrived an hour early, walked around the shopping center and finally found a warm place to nest.

And then, there it stood across the table from me...a pumpkin cream cheese muffin.  Oh my goodness-it was delicious and I was in love.

So I went home and tried to make my own version.  I scratched my recipe down on a tiny piece of paper and shared it with my family.  They loved it.  But then...I lost the recipe.  Earlier this summer to my delight I found it...and then, lost it AGAIN!  I thought it just wasn't meant to be...

One day as I was digging through my bakeware cabinet I saw a tiny piece of paper wedged between two tart pans.  The muffin and I were reunited again!  I was so excited (so was the hubs) that I made the muffins immediately.  They are just so darn good!  I mentioned that I was going to take the rest of them to work and The Hubs' face clearly stated, "I don't think so!"  They are that good-we ate the whole batch...with the help of The Baking Toddler, of course.

To learn more about making the perfect muffin go here!
A perfect breakfast treat!
Pumpkin Cream Cheese Muffins
yield: 1 dozen

4 oz. cream cheese, room temperature
1 T. butter, room temperature
½ t. vanilla extract
3/8 c. powdered sugar

1 ½ c. flour
1 ½ t. cinnamon
¾ t. nutmeg
½ t. cloves
½ t. ginger
¼ t. allspice
½ t. salt
½ t. baking soda
2 eggs
1 cup sugar
½ c. + 1/8 c. vegetable oil
1 c. canned pumpkin
Pumpkin seeds or Walnuts for the topping

1. Lightly pan spray the tops of a regular sized muffin pan. Line pan with muffin cups. Preheat oven to 350°.
2. Cream the cream cheese, butter, vanilla and powdered sugar in a small bowl. Place twelve ½ tablespoon mounds on a parchment lined tray and place in the freezer until firm.
3. Sift the flour, cinnamon, nutmeg, cloves, ginger, allspice, salt and baking soda into a medium sized bowl.
4. In a separate bowl, combine the eggs, sugar, oil and canned pumpkin until smooth.
5. Gradually fold the flour mixture into the egg mixture using a large spatula until just combined.
6. Spoon batter into muffins cups, about ¾ full. Pull the cream cheese out of the freezer and gently roll each mound into a ball. Place the cream cheese balls into the center of the batter and lightly press down. Top with seeds or nuts, if desired.
7. Bake at 350° for 20-25 minutes
Print Me!!!

Monday, December 6, 2010

Inside the Cookie Box-Snickerdoodles

My youngest sister's favorite cookie-Give theses cookies ample room on the cookie sheet-they spread quite a bit.

Snickerdoodles
makes approx. 20 cookies

2 ¾ all purpose flour
2 t. baking powder
½ t. salt
1 c. (2 sticks) unsalted butter
1 ½ c. plus 2 T. sugar
2 large eggs
2 t. ground cinnamon

1. Preheat oven to 350°. Sift together flour, baking powder and salt; set aside. Put butter and 1 ½ cups sugar in the bowl of an electric mixer fitted with the paddle attachment. Mix on medium speed until pale and fluffy, about 3 minutes. Mix in eggs. Reduce speed to low; gradually mix in flour mixture.

2. Stir together cinnamon and remaining 2 Tablespoons sugar in a small bowl. Shape dough into 20 (1 ¾ oz) balls; roll in cinnamon sugar. Space 3 inches apart on baking sheets lined with parchment paper.

3. Bake cookies, rotating sheets halfway through, until edges are golden, 12-15 minutes. Let cool on sheets on wire racks. Cookies can be stored between layers of parchment in airtight containers at room temperature up to 3 days.

Print Me!!!

Thursday, December 2, 2010

Dr. Pepper Sausage

Dr. Pepper Sausage with Garlic Green Beans and Carrots
I love the new Blogger feature that displays your most popular posts.  In fact, I was quite surprised to find my One Box of Puff Pastry, Dinner and Dessert for Six post is number one-but it deserves it.  And I really enjoy seeing the posts climb and fall daily, hourly...it lets me know that there is someone out there enjoying my blog.

One post that has been climbing up steadily is my Dr. Pepper Peanut Brittle.  Since that seems to be popular lately, I'm going to share another Dr. Pepper recipe with you!  Dr. Pepper Sausage.  It is easy and good.  Please forgive the recipe because its one of those "a pinch here/a pinch there" kinda recipes!

Dr. Pepper Sausage
4 servings

1 lb. smoked sausage
1-20 oz. bottle of Dr. Pepper
BBQ sauce (I love Sweet Baby Ray's BBQ sauce)
  1. Slice sausage in 1/4 inch rounds or on the bias, and saute in a pan over medium high heat until browned.  Remove sausage and place on a paper lined tray.  Pour and lightly wipe out the grease in the pan and place back onto burner.
  2. Pour 10 oz. of Dr. Pepper into the pan and bring to a boil.  Swirl pan frequently until the Dr. Pepper has reduced and has a thick and syrupy consistency.
  3. Add sausage back to the pan and coat with the reduced Dr. Pepper.
  4. Add as much BBQ sauce as you'd like.  I like mine pretty saucy!
  5. Drink the rest of the Dr. Pepper with your meal!  :)

Monday, November 29, 2010

Inside the Cookie Box-Lime Meltaways

It seemed that Martha Stewart had a slight obsession with Lime Meltaways a while back...and no wonder, they are so good!
Lime Meltaways
makes about 5 dozen

¾ cup (1 ½ sticks) unsalted butter, softened
1 cup confectioners sugar
Grated zest of 2 limes, plus 2 tablespoons fresh lime juice
1 T. pure vanilla extract
1 ¾ cups plus 2 tablespoons all purpose flour
2 T. cornstarch
¼ t. coarse salt

1. Put butter and 1/3 cup sugar in the bowl of an electric mixer fitted with the whisk attachment, and mix on medium speed until pale and fluffy. Add the lime zest, lime juice and the vanilla, and mix until fluffy.

2. Whisk together flour, cornstarch, and salt in a medium bowl. Add to butter mixture, and mix on low speed until just combined.

3. Divide dough in half. Place each half on an 8-by-12 inch sheet of parchment. Roll dough into a log on parchment to 1¼ inches in diameter, pressing a ruler along edge of parchment at each turn to narrow log. Refrigerate logs until cold and firm, at least 1 hour.

4. Preheat oven to 350°. Remove parchment from logs; cut into ¼-inch-thick rounds. Space rounds 1 inch apart on baking sheets lined with parchment paper.

5. Bake cookies until barely golden, about 13 minutes. Transfer cookies to wire racks to cool slightly, 8 to 10 minutes. While still warm, toss cookies with remaining 2/3 cup sugar in a resealable plastic bag.  Cool cookies completely and toss in the sugar once again.

Cookies can be stored in airtight containers up to 2 weeks.

Print Me!!!

Monday, November 22, 2010

Inside the Cookie Box-Cream Cheese Spritz Cookies

This recipe is a marriage between two spritz cookie recipes.  My friend posted a link on facebook for cream cheese spritz cookies, my husbands favorite Christmas cookie.  Struck by curiosity, I combined my grandmother's recipe and the cream cheese recipe resulting in a tender and subtle flavored cookie.

Cream Cheese Spritz Cookies
yield:  7-8 dozen

8 oz. (1 cup) unsalted butter, softened at room temperature
3 oz. cream cheese, softened at room temperature
¾ cup granulated sugar
1 large egg
½ tsp. almond extract
2 ¼ c. all-purpose flour, sifted
Food coloring, sparkling sugars or other decorations for sprinkling (optional)

1. Preheat oven to 350° F. Cream butter & cream cheese in mixing bowl, add sugar, and beat until light and fluffy.

2. Beat in egg and add almond extract and food coloring (if using). Blend in flour gradually.

3. Fill cookie press and press cookies onto parchment

4. Bake for 8-12 minutes. Cool on wire rack.

Print Me!!! 

Part of the Inside The Cookie Box Holiday Edition 

Monday, November 15, 2010

Inside the Cookie Box-Brown Sugar Shortbread


Brown Sugar Shortbread
yield: 1-2 dozen 
1 c. butter, room temperature
½ c. dark brown sugar
2 c. flour
2-3 T. sparkling sugar

1. Cream butter and sugar together and add flour, a little at a time until incorporated.
2. Chill for 30 minutes
3. Roll dough out to a ¼ inch thickness
4. Cut out shapes using cookie cutters; sprinkle with sugar.
5. Bake at 375°F for 10-12 minutes

Print Me! 

Part of the Inside The Cookie Box Holiday Edition

Friday, November 12, 2010

Apple Cider & Rosemary Ice Pops

First Snowfall
I had such a wonderful vision for this blog post.  Vision, as in an 'ah-ha' photog moment.  My 2 year old son, wearing the cutest Gap-like clothing, would be in our somewhat still green backyard holding a golden ice pop and I would snap the perfect autumnal shot wrapped in adorable toddler wonder. 

Boy was I wrong...needless to say I don't have the shot.  It could be because my model wouldn't hold the pop, or because he ran and hid behind the truck, or maybe it was because I relied on a two year old to cooperate period.  Oh well, I'll just share one of my favorite fall time photos instead.

Apple Cider & Rosemary Ice Pops
Makes 6

2 cups apple juice
¼ cup water
¼ cup sugar
1 Tablespoon chopped fresh rosemary
1 cinnamon stick, broken in half
1 whole clove
2 tsp. apple cider vinegar
¼ tsp. vanilla extract

1. Combine first 6 ingredients in saucepan. Bring mixture to boil, stirring until sugar dissolves. Reduce heat to medium; simmer until mixture is reduced, about 20 minutes.
2. Strain into 2 cup measuring cup; add vinegar and vanilla; cool to room temperature.
3. Pour into six 1/3 cup ice pop molds. Insert pop covers and sticks; freeze overnight.

Monday, November 8, 2010

A Sweet Exchange-Inside the Cookie Box

This is an announcement for my six week holiday cookie event starting Monday, November, 15.  Tune in every Monday for the next few weeks for a new holiday cookie recipe.  And best yet...it's just a picture and recipe!!! You don't have to read (scroll down and skip) my pointless drivel. :)

Last year I had an amazing idea.  Carrying on the tradition of homemade & baked holiday treats, I decided to make cookie boxes for friends and family.  I usually have a gift theme every year, gingerbread & lemon, homemade marshmallows and hot chocolate mix, caramel & butterscotch, but never had I gifted cookies.  Let me tell you...it was the most time consuming experience out of all of my holiday treats...ever!  There had to be an easier way...and there is, host a cookie swap!

The Invite
Invite guests three to four weeks in advance. Have each person bring along copies of their recipe as well as some supplies for gift-wrapping, such as ribbons, tags and boxes.  A good number of people to invite would probably be around 6 to 8.

The Cookies
Ask each guest to make a dozen cookies for every person in attendance, plus an extra dozen for sampling. If the number seems too daunting, don't fret, ask them to bring a half dozen per person in attendance.  Just make sure everyone will go home with an assortment of several dozen cookies to give as gifts.

The Swap
On the day of the party, brew some coffee and tea, and clear a few tables for a sampling station, swapping and packaging stations. Provide several platters and cake stands and have each guest put out a plate of cookies for tasting along with their provided recipes. Once it is time to trade, have each person walk around the table to pick up their share for packaging.

The Gift Wrap Station
Ask guests to bring wrapping materials. Set everything out on a large worktable and have guests make their cookie boxes. Supplies needed: tags or labels, ribbons, twine, cardboard boxes, tissue paper, baking papers, cellophane, scissors, paper plates.

Give it a try! It might lead to the beginnings of a sweet tradition. Happy Holidays!

Inside The Cookie Box Line Up
Brown Sugar Shortbread
Cream Cheese Spritz Cookies
Lime Meltaways
Snickerdoodles
Great Grandma's Sugar Cookies
Spice Cookies

Of course I'm not going to leave you without a recipe...I'm going to link you to my very first (and probably most overlooked) posted recipe.  Amazing Butterscotch Cookies.

Monday, November 1, 2010

A Wednesday Tradition, Toasted Oatmeal with Sauteed Apples

Months ago my husband began training to run a marathon for The Leukemia & Lymphoma Society's Team In Training.  Working in the mornings and training during the evenings meant he would be gone all day on Wednesdays.  Because of his absence I decided to make a non-dinner tradition of "Toasted Oatmeal Wednesdays."

Its quick, delicious and nutritious (depending on your add ins) and it is one of my son's favorites.  A big win-win for Wednesdays!  I make the standard toasted oatmeal and with each week introduce new toppings.  My favorite is the sauteed apples (recipe below), Lil' Buddy's is almonds and cranberries (not too shabby either!)
If you'd like to donate to The Leukemia & Lymphoma Society please click here.  In addition to raising money to find a cure, the LLS also:
  • Provides financial support for treatment and medication
  • Provides group and online support for the patients and family members
  • Will arrange for transportation to and from medical and other treatment facilities
 
Toasted Oatmeal
makes 2 cups
1 T. unsalted butter
½ cup Irish, Scottish, or any steel-cut oatmeal, or 2 ½ cups old-fashioned rolled oats
Pinch of salt

1. Melt butter in a large heavy saucepan over medium heat. Add the oatmeal, and toast, stirring the oats until the oatmeal is fragrant and slightly golden, about 4 minutes.
2. Add 4 cups water and salt, and bring to a boil.
3. Reduce to a simmer, cover, and cook until most of the water has evaporated and the oatmeal is tender (30 minutes for the steel-cut oatmeal and 10 minutes for the old fashioned rolled oats). Serve hot w/ the topping of your choice.

Sauteed Apples
serves 4
2 apples (or pears), peeled and cored
Juice of one lemon
1 T. unsalted butter
2 T. sugar

1. Cut each apple into 8 wedges. Toss the apples and lemon juice in a medium bowl, and set aside.
2. Melt the butter in a large skillet over medium heat. Add apples and 1/2 cup water. Sprinkle with sugar
3. Simmer until water has evaporated and apples are golden brown, stirring occasionally, about 8-10 minutes. Serve Warm.

Friday, October 29, 2010

Spiced Beef Cornbread

 Halloween is by far my favorite holiday.  I think now, as an adult, it is because it is the kick off to the holiday season. As a child it was because my neighborhood knew how to give Halloween a proper celebration.  And it wasn't really the kids as much as it was the parents who led in the haunting of our East Texas neighborhood.  Freddie Kruger would hobble down the streets, Jason would quickly stumble down the path and the guy from Texas Chainsaw Massacre would chase you down the streets ripping his unchained chainsaw (I had never ran so fast!)

My dad, dressed in all black, red faced, donning a black wig and horns was a first class Lucifer.  He would jump out of the tree and startle trick or treaters, that is until one unfortunate Halloween when he threw his back out.

Even though our neighborhood Lucifer had been benched, my dad took on a new (and more brilliant) Halloween persona the next year.  "The Pumpkin Man" was dressed in flannel, overalls, work gloves and boots and had a gigantic pumpkin for a head.  He sat by our front door like a lump while my mom fussed with his clothes (mainly to make it look like she was stuffing him with hay-it was such a great act.)  

Parents would walk up to the door with their little ghosts or goblins and "Pumpkin Man" would move ever so slightly.  "Pumpkin Man" never really made any fast or sudden moves, he'd just creepily turn toward the crowd or brush up against a parent's arm.  That Halloween persona scared many people, kids and adults alike and a number of candy bags were left behind on our front porch.

One year after the debut of "Pumpkin Man," I was sitting in my 8th grade class listening to my fellow students talk of their Halloween plans.  Of course many planned to visit my neighborhood, even though they lived across town.  One boy blurted out, "I know one thing, that Pumpkin Man better not get me!"  Without looking at the boy I sat their smiling, amazed that he was remembered and known. All I could think was, yep, that's my dad!
Spiced Beef Cornbread would be a perfect meal for Halloween night.  Not because it is spooky, but because it is easy, filling and good.  Whip this up in no time and send your trick or treaters out the door.  It has a nice warmth from the cinnamon (yes, cinnamon) and I love the cheesy cornbread topping.  Great dish for a fast, fall meal.

Spiced Beef Cornbread Cobbler
4 servings
adapted from Gourmet December 2006

1 medium onion, chopped
4 T. olive oil
2 garlic cloves, chopped
3 carrots, medium diced
1 pound ground beef or turkey
1 t. sugar
¼ t. ground cinnamon
½ t. cayenne
¼ t. ground allspice
¼ t. pepper
¾ t. ground ginger
1 ¼ t. salt, divided
14-15 oz. canned crushed tomatoes
2/3 c. yellow cornmeal
1/3 c. flour
1 t. baking powder
1/3 c. whole milk
1 large egg
2 oz. coarsely grated sharp cheddar (1/2 c. plus 2 T.)

1. Preheat oven to 400°F. Lightly oil a 9-½ inch pie/tart/casserole plate.
2. Cook onion in 2 tablespoons oil over medium heat, stirring occasionally, until translucent, 3-4 minutes. Add carrots and cook until soft. Add garlic, cook for 1 minute.
3. Add beef and cook, breaking up large chunks, until no longer pink. Add sugar, spices, and 1 teaspoon salt and cook, stirring until incorporated. Add tomatoes and briskly simmer, stirring occasionally, until liquid is reduced to about ¼ cup, 8-10 minutes.
4. While beef simmers, whisk together cornmeal, flour, baking powder, and remaining ¼ teaspoon salt in a medium bowl. Whisk together milk, egg, and remaining 2 tablespoons oil in a small bowl, then stir into cornmeal mixture until just combined. Fold in ½ cup cheese.
5. Spoon cooked spiced beef into pie plate with a slotted spoon. Spoon 4 mounds of cornbread batter over beef, then sprinkle remaining 2 tablespoons cheese over batter. Bake until a wooden toothpick inserted into center of cornbread comes out clean, 15-25 minutes. Serve warm.

Monday, October 18, 2010

Snickerdoodle Mini Muffins

The other day I saw a tee shirt advertised in a magazine that said, "Muffins are just ugly cupcakes."  For some reason I took offense to this, gasped, and quickly came to their defense "ARE NOT!"  Except, there was no one to argue this point with, the only other person in the room was BabyBoy, and there is not much talking coming from him!  Regardless, I found this statement to be wrong.

I love muffins.  They are so cozy and warm and I find myself "popping the top" much like Elaine had done on Seinfeld (except I eat the stumps too).  Similar to pancakes, the secret to a great muffin, besides using fresh ingredients, lies within the mixing.  Overmixing can produce a rubbery, rather than fluffy, texture.  And I suppose then, and only then could a muffin be called ugly!

Making Muffins, Step By Step
  1. For best results bring milk, eggs, and butter to room temperature.
  2. Whisk together dry ingredients in one bowl and wet ingredients in another.
  3. Make a well in center of dry ingredients.
  4. With a large rubber spatula, fold wet mixture into dry one, with few strokes as possible.
  5. Fill buttered muffin tins about three quarters of the way with batter.  This leaves enough room for a crumb topping and makes muffins that are the right size for snacking.

You're Not So Ugly Snickerdoodle Mini Muffins
yield 2 dozen
Print Me!!!

10 T. (1 ½ sticks) unsalted butter, melted, plus more for the pan
1 c. sugar
1T. plus 1t. ground cinnamon
1 ½ c. flour
2 t. baking powder
½ t. salt
½ c. buttermilk
1 large egg

1. Preheat oven to 375°F. Butter a mini-muffin tin, and set aside. In a small bowl, combine ½ cup sugar and 1 tablespoon cinnamon; set aside.
2. In a large bowl, combine flour, baking powder, salt, and remaining teaspoons cinnamon; whisk to combine.
3. In a separate small bowl, combine 6 tablespoons butter, remaining ½ cup sugar, buttermilk, and egg; whisk to combine.
4. Using large rubber spatula, fold butter mixture into flour mixture; use no more than 10 strokes. The mixture should be lumpy.
5. Spoon 1 tablespoon batter into each prepared cup, and bake until tops are nicely golden, about 8 minutes. Remove from oven; let cool in pan 10 minutes before transferring to rack to cool
6. Dip top of each muffin in remaining 4 tablespoons melted butter and roll in reserved cinnamon mixture. Serve warm or room temperature.

Monday, October 11, 2010

Dr. Pepper Peanut Brittle


I don't know why I think of Halloween every time I think of peanut brittle.  My grandmother made peanut brittle during the holidays and it always made its presence on the table at their annual Christmas Eve party, but I always think of it as a Halloween snack.  Maybe I should ask her if she made a batch during Halloween and the thought of it is trying to break through my subconscious.

This however, is not her recipe for brittle.  I started making Dr. Pepper Peanut Brittle when my husband was trying to kick the habit...of Dr. Pepper, I should say.  He was a serious addict.  One night he brought home a 3 liter bottle, yes, a 3 liter bottle of this stuff-it was gone in a day and a half.  I hate Dr. Pepper...so I know, and he knew who drank that whole bottle.  After me making some serious fun of him, and maybe a realization of a dependency, he decided to ween off of it.  He has been "clean" for several months now.  As a treat I make him this special little brittle.  It is so good and...addicting (OH NO!! What have I done???)

Dr. Pepper Peanut Brittle
Print Me!
1 ¼ c. sugar
¾ c. butter
1 ½ t. salt
¼ c. Dr. Pepper
2 c. lightly salted peanuts
½ t. baking soda

1. Line a rimmed baking sheet with pan sprayed foil.
2. Combine the first four ingredients in a saucepan and cook on medium heat bringing it to a boil, stirring often.
3. Once the temperature has reached 290°F on a candy thermometer, remove from heat and add peanuts. Stir. Add baking soda, and stir to combine.
4. Pour mixture onto foil lined baking sheet and cool until hardened. Break candy into shards.

Monday, October 4, 2010

A Sort of Philosophy and Creme Fraiche

Doing What I Do Best:  Baking For The Boys
A Sort of Philosophy
A few years ago my mom and I threw my sister a baby shower. We split the responsibilities and I happily took the post of menu planner/caterer (duh-that's my gig). So I sat down and worked up a menu, planned the table set up (my husband would divorce me if I used the term tablescape-he hates that term), beverages...you get the idea. Weeks before the shower my mom called and asked about the menu and I rattled off my ideas.

"What beverage?" she asked. "Oh, I was thinking of an easy punch called mock champagne, it was the most popular beverage we served at weddings when I catered." Silence. I could tell she wasn't buying it. Over the weeks she called a few more times with the same question, and I always had the same answer and she always had the same response.

Finally, the conversation changed and went a little something like this: "What beverage?" "Mock Champagne, take one bottle of Canada Dry and one bottle of any blend white grape juice and pour it a bowl. It is good. Very popular drink from that caterer I used to work for." "Oh, do you think people will like it?" I finally cracked, "Mom, do you really think I'd just put shit out on the table?" 

The point of this story is to share how I feel about this blog. I'm just not going to post mediocre recipes so I can fill my archive box to the max. If the food is good, I'll share, and if not...sorry it just won't make the cut.

I'm not here to make money either, not that there is anything wrong with that-I just don't want to worry over something that is essentially my hobby. I'm not here to become popular or to impress anyone either. Am I looking for a book deal?  No.  I'm just here to share good, quality, unpretentious, budget (most of the time) and family friendly food with folks...and maybe make a few new friends along the way.

DIY: Crème Fraiche
Now on to the recipe. Here is an easy and great recipe for crème fraiche. I have difficulty finding crème fraiche at my everyday grocery store. I knew exactly what aisle it was housed on when I worked for a specialty food store years back and I must admit, it was quite pricey. This recipe uses a bit of time and a few staple ingredients (I used left over ingredients from my son's birthday party)-that's it.
Crème Fraiche
I see creme fraiche caramel and creme fraiche based ice cream in the near future...

2 cups heavy cream
2 Tablespoons sour cream
• In a small bowl, combine the cream and sour cream, and mix well. Cover and let sit at room temperature overnight. Refrigerate until thickened.

Tuesday, September 21, 2010

Goodbye, Summer (Corn Fricassee)

Corn Fricassee
Today is the last day of summer and I must admit, I'm not really upset with her departure.  She was at most a tease at the beginning with her low to mid 90 temperatures, only to release her fury by August with triple digits.  So, I bid you adieu, you blazing hot season-I won't miss you!

I will admit though, that I'll miss sweet berries, juicy melons, and sweet, succulent, golden corn.  Corn's peak season, for the most part, is mid to late summer, but I guess it just all depends on where you live, right?

So, if you are enjoying a late summer corn harvest, please try this corn fricassee.  It was one of my favorite summer side dishes this season.  Sweet corn, enrobed in a creamy sauce, a salty bite from Parmesan=side dish from heaven folks!
Corn Fricassee makes a great accompaniment to braised pork chops; roasted broccoli also pictured

Corn Fricassee
Serves 4
Print Me!

6 ears corn (about 6 cups kernels)
4 T. unsalted butter
2 shallots, finely chopped
2 t. all purpose flour
1 cup chicken stock
1 cup heavy cream
½ t. salt, or more to taste
¼ t. pepper
2 T. roughly chopped fresh basil
1 oz. Parmesan cheese, grated, plus more for garnish

1. Using a chef’s knife, remove kernels from cobs into a bowl. Using dull side of knife, scrape milk and pulp from cobs; add to bowl.
2. Heat butter in a medium saucepan over medium heat. When melted and bubbling, add shallots. Cook, stirring, until soft and translucent.
3. Add corn kernels, corn milk, pulp, and flour. Cook, stirring, 1 minute. Stir in chicken stock. Turn heat to high; cook until liquid is reduced by half, about 3 minutes. Add cream; cook until mixture is thick and creamy, about 4 minutes more.
4. Remove from heat; stir in salt, pepper, basil, and cheese. Garnish with Parmesan.

Monday, September 6, 2010

The Key To A Light & Fluffy Pancake

Tiny Bubbles...
Lately, it seems that I have become a pancake aficionado of sorts. My son LOVES pancakes and I often make them once (or twice) a week. I have made all different kinds, pumpkin, whole wheat and his favorite, buttermilk. During my quest to make the perfect pancake, I have found these simple steps to be the key to tender, light, and fluffy pancakes.

It's All In The Mix
  • In a medium bowl, whisk together the dry ingredients to incorporate.
  • Mix the wet ingredients into the dry ingredients. Do not whisk the batter to a smooth uniform consistency-this can result in a tough pancake. Instead lightly mix the batter, leaving it lumpy. The reaction of liquid and the pockets of dry ingredients (lumps) result in fluffy, light pancakes-isn't food science cool!
Less Is More
  • The more melted butter there is in the pan does not necessarily mean the better the pancake. There is a good chance you'd end up with a "fried," crispy pancake exterior and an undercooked interior. Instead, rely on a thin film of butter coating the pan. I wipe the excess butter off of the griddle with a paper towel. This insures a pancake with even browning.
Flip It Good
  • It is best to flip the pancake when the batter surface is covered with tiny bubbles. The edges will bubble first and will begin to look a little dry. Avoid the temptation to flip until some of the interior bubbles have burst.
Get Creative
  • For fruit pancakes, place fruit on top of the batter after its been poured onto the griddle. That way, you'll have fruit evenly distributed throughout the pancake. Nut and granola toppings will lose their crunch if they sit in the batter too long-so sprinkle those just as you would the fruit.
Add Ins:
  • Sliced Bananas
  • Berries (strawberries, blueberries, blackberries)
  • Rum-soaked raisins
  • granola, pecans, walnuts
  • Apple & Cinnamon
  • Lemon Zest & Poppy Seeds
Basic Buttermilk Pancakes
Yields: nine 6-inch pancakes
Martha Stewart Living, January 2001
Print Me!
Ingredients
• 2 cups all-purpose flour
• 2 teaspoons baking powder
• 1 teaspoon baking soda
• 1/2 teaspoon salt
• 3 tablespoons sugar
• 2 large eggs, lightly beaten
• 3 cups buttermilk
• 4 tablespoons unsalted butter, melted, plus 1/2 teaspoon for griddle

Directions
1. Heat griddle to 375 degrees. Whisk together flour, baking powder, baking soda, salt, and sugar in a medium bowl. Add eggs, buttermilk, and 4 tablespoons butter; whisk to combine. Batter should have small to medium lumps.
2. Heat oven to 175 degrees. Test griddle by sprinkling a few drops of water on it. If water bounces and spatters off griddle, it is hot enough. Using a pastry brush, brush remaining 1/2 teaspoon of butter or reserved bacon fat onto griddle. Wipe off excess.
3. Using a 4-ounce ladle, about 1/2 cup, pour pancake batter, in pools 2 inches away from one other. When pancakes have bubbles on top and are slightly dry around edges, about 2 1/2 minutes, flip over. Cook until golden on bottom, about 1 minute.
4. Repeat with remaining batter, keeping finished pancakes on a heatproof plate in oven. Serve warm.

Monday, August 30, 2010

The Amazing Disappearing Rice Krispie Treat

If there is one sweet treat that seems to pull off the greatest of all disappearing acts it is the Rice Krispie® Treat. Seriously! I could set a decadent chocolate cake, fudgy brownies, a delicious fruit filled pie and Rice Krispie® treats out on a table and I guarantee the familiar cereal squares from childhood would be the first to go (and in record time, mind you).

What is it about this goody that sends kids and adults alike running toward the dessert buffet? Is it because it creates a feeling of nostalgia? Is it because of our secret adoration for Snap, Crackle and Pop? Or, is it because of the sweet, sticky, gooey concoction that holds the little puffed rice together? Whatever the reason (and I'm pretty sure it is a combination of all the above) they don't last very long around my house.

These treats are very simple to make and not too time consuming. I've used different cereal too, Cocoa Krispies®, Cocoa Puffs®, Fruit Loops®, Cap'n Crunch®...the list goes on... This recipe trends a little off of the original-they are a little bit more buttery and gooey!
Melissa's Cereal Treats
yield: 16 squares
Print Me!

7 cups mini marshmallows
5 Tablespoons Butter
1/2 t. salt
6 cups of puffed rice cereal (or any other crunch, puffed cereal)

1. Coat an 8x8-baking pan with nonstick spray. Line with a sheet of waxed paper, allowing for an overhang to allow you to lift the cereal treats out of the pan. Spray with nonstick spray.
2. Cook the marshmallows, butter and salt over medium-low heat, stirring frequently until smooth.
3. Remove from heat and stir cereal into the marshmallow mixture using a heat resistant, rubber spatula; mix thoroughly and fold the mixture bringing up marshmallows from the bottom of the pan.
4. Spoon in mixture. Coat hands with nonstick spray and press mixture firmly into the pan. Press into the corners of the pan and the top to smooth. Allow to cool.
5. Remove from pan by lifting the overhanging waxed paper ends. Cut into cubes.

Sunday, August 15, 2010

Outside-In Cheddar Sliders

Outside-In Cheddar Sliders on Mini Buns
Summer is finally coming to a close (you can thank me for stating the obvious later).  Teachers are back in their classrooms prepping for the upcoming year and parents are roaming the grocery aisles with school supply lists in hand.

As a kid I hated this time of year.  Whether it was the end of summer or the angst of beginning a new school year, I could have done without mid to late August.  And still I find myself not really being a fan of this time of year, though it is only because of the heat.  It is just too darn hot!

Like my new Weber kettle grill??? Bought it half price and already assembled (score!)
And speaking of hot...how about some girl on grill action (sorry for the pun.)  B4tB is getting a little meaty this month with these tiny burgers.  They are so cute and pretty darn good-and this is coming from someone who doesn't really eat beef.  Yes, I am from Texas and am not crazy about beef...I am an anomaly!

My accompaniments of choice: mustard, pickles and oven dried tomato-oh yeah!
Outside-In Cheddar Sliders on Mini Buns
Bon Appétit, July 2009
Yield: Makes 8

Ingredients
1 1/2 pounds ground chuck (20% fat)
4 1-inch cubes sharp cheddar cheese, each halved
Salt & Pepper
8 soft dinner rolls, split

1. Divide meat into 8 equal pieces (approx. 3oz. ea) Shape into balls.
2. Press 1 cheese piece into center of 1 meatball and enclose cheese in meat. Flatten to 21/2- to 3-inch-diameter patty. Repeat to form 7 more patties.
3. Sprinkle both sides of patties with salt and pepper.
4. Prepare barbecue (medium-high to high heat). Grill patties until cooked to desired doneness and cheese centers soften, about 5 minutes per side for medium.
5. If desired, grill cut side of rolls until toasted, about 1 minute. Transfer patties to rolls; let rest 5 minutes. Serve with your favorite burger accompaniments.
Print Me!

Tuesday, August 10, 2010

Lessons From The Playground-Strawberry White Chocolate Shortcake Cookies

My son is fanatical about the playground. We are very fortunate to live in a neighborhood with three parks and try to visit one of them each day. As a new mom, it seems like I've learned a lot from the playground myself, much like a kid does I suppose. This is what I've learned:
  • If your child falls in love with the swing, be prepared to stand there and push until your arm falls off.
  • Keep an eye on those miniature geologists-because some of those "rocks" end up being dog poo.
  • If you hear the names "Chet" and "Greyson" turn around and walk away because your kid will get beat up if you stick around.
  • Don't become offended if the playgroup moms blatantly ignore you-even if you are the only non-playgroup mom at the park. Apparently the playground can be cruel to adults too!***believe me I wasn't hurt, just thought it was rude and weird.
  • Always have on hand: first-aid kit, beverage, snack, diaper, wipes, chalk, bucket and shovel! Especially if your kid is wild, has found his new pooping spot under the slide or borrows unsuspecting kid's park toys...
Maybe I should bring these cookies to the park...I wonder if those moms would ignore me then...or forgive my child for taking their kid's toys?

Strawberry White Chocolate Shortcake Cookies
slightly adapted from MS Living Magazine; June 2009

yield: 3 dozen

1 1/2 c. strawberries, cut in 1/4 in. dice
1/2 c. + 1 Tbsp.s sugar
1 tsp. lime juice (can use lemon)
2 c. flour
2 tsp. baking powder
1/2 tsp. salt
6 Tbsp. cold unsalted butter, cut into small pieces
2/3 c. heavy cream
6 oz. white chocolate chips
Sanding sugar

1. Preheat oven to 375 F.
2. Toss strawberries, 2 T. sugar and lime juice in a bowl to combine
3. Whisk flour, baking powder, remaining 7 T. sugar and salt to combine. Cut in the cold butter (much like making pastry (pie) dough) using a pastry cutter or hands until mixture resembles coarse crumbs.
4. Stir in cream until dough starts to come together. Stir in Strawberry mixture. Stir in Chocolate Chips until all is combined.
5. Drop onto parchment covered baking sheets. Sprinkle with sugar and bake for 20-25 minutes. Transfer to a wire rack and cool.

Notes: Because of the fresh strawberries these cookies don't have a very long shelf time. Maybe 1 day in an airtight container. They are so good the day they are made.

Print Me!

Monday, July 26, 2010

The 'Burbs & Blueberry Cream Cheese Pound Cake

Do you remember The 'Burbs?  Tom Hanks plays a stressed out suburbanite trying to enjoy his vacation but is lured by two neighbor's conspiracy theory that his new neighbors are creepy, in a cult or even murderers.  My sister and I loved that movie.  You could hear us blurt out, "It came with the frame!" and "pizza dude," at any random moment in the late 80's, early 90's.

A few weeks ago I had a flashback to one particular scene from the movie.  All the homeowners were enjoying the warmth of the sun, watering their perfect emerald green lawns, tending to their gardens, shooting hoops, painting their house and then the garage door opened...everyone on the block immediately stopped what they were doing as the Klopecks passed by in their rickety car.

That is exactly what happened when my neighbor opened her garage, pulled out of the driveway and drove on by.  We were just missing the eerie, suspenseful background music, but the two scenes were identical.

We have lived in our cozy little suburban neighborhood for over a year now and have seen our neighbor maybe five times.  Blinds and curtains are usually drawn the moment she hears my son and I walk out the door.  She has a lawn service tend to her yard and will make the block in her car just to get the mail which is only a few feet from her front steps.

Quite often her sun stroked potted plants will be replaced by vibrant, fresh and healthy flowers overnight.  When does she do it?  We have joked that she does it in the middle of the night, and guess what...she does.  My husband leaves the house at 5am for marathon training and found her tending to her sprinkler system with flashlight in tow.  So strange.

Agoraphobia would explain it...but we believe she has a 9-5 job.  We've also speculated that she is in the witness protection system or hiding from someone.  And of course, The 'Burbs cross our minds every once in a while.
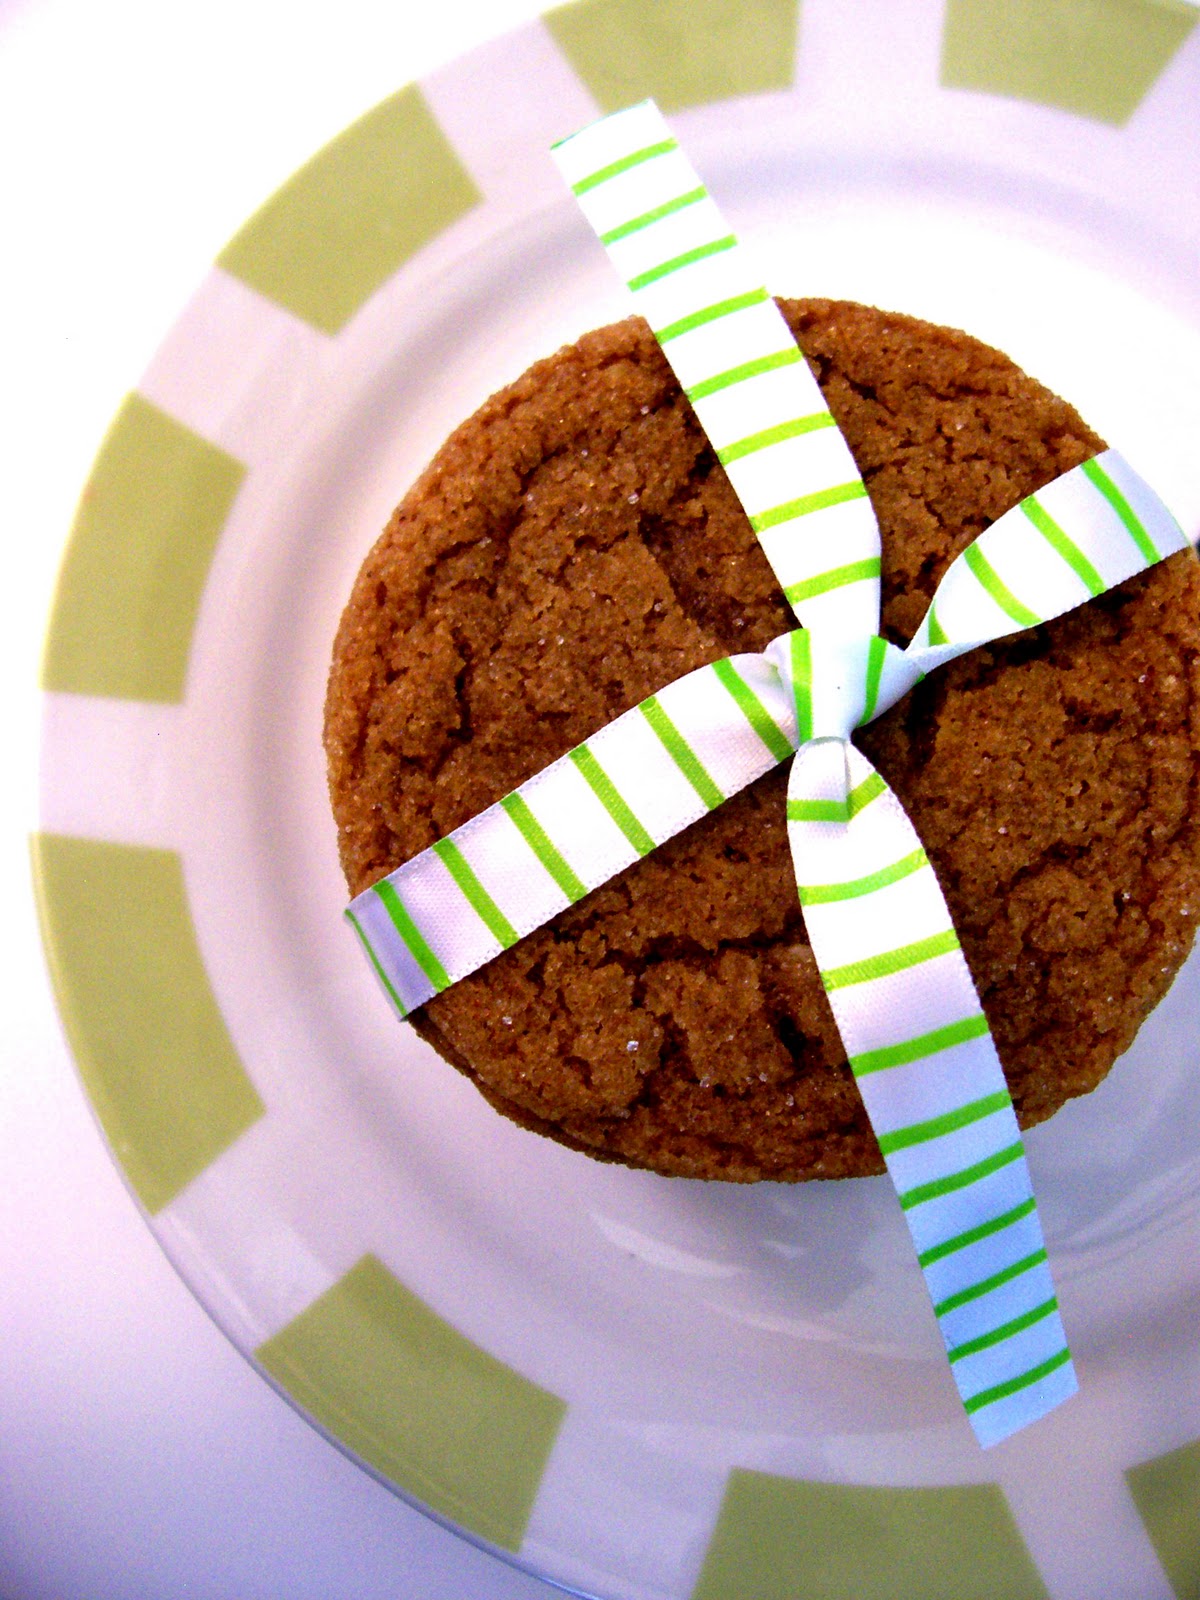
She even missed out on this scrumptious pound cake.  It was so delicious my husband and I couldn't stop eating it, so out of the house it went.  Where to, you ask...our neighbors, on the other side of us.

Know Thy Neighbor Blueberry Cream Cheese Pound Cake
slightly adapted by Central Market Cooks
Serves 16

3 cups flour
2 cups blueberries
1 teaspoon baking powder
½ teaspoon baking soda
½ cup butter, softened
4 ounces cream cheese, softened
2 cups sugar
3 eggs
1 egg white
8 ounces (1 cup) lemon yogurt
2 teaspoons vanilla

Lemon Glaze
1 cup confectioners’ sugar
1 tablespoon lemon juice
1 tablespoon hot water

1. Toss 2 tablespoons of the flour with the blueberries in a small bowl to coat evenly. Mix the remaining flour with the baking powder and baking soda.
2. Cream the butter, cream cheese and sugar in a mixing bowl, beating at medium speed until light and fluffy.
3. Beat in eggs and egg white one at a time, mixing well after each addition. Add the flour mixture alternately with the yogurt, beginning and ending with the flour mixture and mixing well after each addition. Fold in blueberries and vanilla.
4. Spoon into a 10-inch tube pan coated with nonstick cooking spray. Bake at 350°F for 1 hour and 10 minutes or until a wooden pick inserted in the center comes out clean. Cool in the pan on a wire rack for 1 hour. Remove to a cake plate.
5. For glaze, combine the confectioners’ sugar, lemon juice and hot water in a small bowl and mix until smooth. Drizzle over the warm cake. Cut the cake with a serrated knife to serve.
Print Me!

Monday, July 12, 2010

Mixed Greens with Blueberries and Lime Vinaigrette

This post only seems to be fitting in every way possibly at the moment.  For one, July is National Blueberry Month-so lets honor our favorite, tiny, plump, blue friend.  Did you know blueberries are grown in 35 states in the US, and the United States produces over 90% of all of the blueberries in the world.  Just wanted to share a little factoid with you.

Secondly, and on a more personal note, I have grown tired of my weight and have finally decided to do something about it.  For months P90X has been staring me in the face and I finally decided to pop it into the DVR.  Oh. My. Word.  It is tough, but I actually enjoy it quite a bit.  You tend to be so busy during the workout that you don't get bored (I used to suffer from gym-boredom) and time flies by quickly.

And as always, with exercise comes a healthier diet.  I used to have a strict regimen before BabyBoy came along and once he reached toddlerhood I found myself snacking...a lot.  Not to mention the sweet tooth (obviously, I have a blog dedicated to homey baked goods).  But don't worry-I'll still be baking...I'll just be sending my sweet treats to the hubby's work!

OK time to talk salad!  This was such a palate pleasing salad.  The vinaigrette was tart and tangy with a delicate, mild note from the shallot.  The blueberries give a burst of sweetness that lends a pleasant surprise.  All in all, the flavors marry very nicely.

Mixed Greens with Blueberries and Lime Vinaigrette
recipe from Central Market, adapted from 12 Best Food Cookbook
4 cups, organic baby spring mix
¼ cup mint leaves, stacked and cut crosswise into thin strips
Juice of ½ lime
2 tsp. balsamic vinegar
1 tsp. shallot, chopped
½ tsp. salt
1 Tbsp extra-virgin olive oil
Fresh ground black pepper, to taste
½ cup blueberries

1. Place spring mix and mint in large mixing bowl.
2. To make the dressing, combine lime juice, vinegar, shallot and salt in a small bowl. Whisk in olive oil and season with pepper.
3. Pour the dressing over the greens, and toss to coat lightly. Sprinkle blueberries over the greens.
PRINT ME

Tuesday, July 6, 2010

Road Trippin'-Almond & Peanut Butter Granola Bars

Sometimes drifting off the beaten path will lead you to this...
Every summer my family would load our car, hitch up the pop-up and hit the road. It was a very long haul from our southeast Texas home to the mountainous destination of Colorado. We would leave our home in the wee hours of the morning and drive all day (usually having to turn back, it seemed something was always forgotten.)
Road Trip 2007 Coulter Bay, Wyoming
Our first stop was a campground just on the edge of the panhandle (that's right, we'd still be in Texas after a days worth of driving.) My sister and I would play Barbies, Eye-Spy, sing songs, and sleep (alot). We'd signal truck drivers to honk their horn and my sister would usually be the comedian and make faces at passersby or stick fishing worms up her nose to see if anyone would notice. Needless to say, we knew how to make the most of a cramped backseat.

My mom always packed snacks for us to eat, which was special because we were NEVER allowed to eat in he car. Looking back it seemed that she chose very carefully what was given to us, being that none would stain the upholstery of the seats. At most she'd have to vacuum out crumbs.
Making friends while fly fishing
The next day, we flatlanders were awestruck by how the majestic Rockies would greet us. It was such an exciting moment for my sister and I. We would set up camp along the Taylor River, near Almont, Colorado, and camp, hike, fish, drive the back roads, have "fire parties" (campfires), and roam the campgrounds like we owned the joint.

Our road trips made for a great summer and wonderful memories. I am anxious to start the tradition with my husband and son.

What is your favorite road trip memory?


Chewy Almond-Peanut Butter Granola Bars
Makes 12 bars

½ c. old-fashioned oats
½ c. dried cranberries
½ c. sliced almonds
¼ c. all natural peanut butter
¼ c. all natural almond butter
½ c. brown sugar
½ t. cinnamon
3 T. vegetable or canola oil
1 T. water
¼ t. salt
1 egg white

1. Preheat oven to 300 degrees, line an 8 x 8 baking pan with two strips of parchment paper, allowing a 2 inch over hang for all sides.
2. In a large bowl combine oats, cranberries and almonds
3. Over low heat, combine almond and peanut butters, brown sugar, oil, salt, water and cinnamon in a small saucepan until sugar dissolves. Remove from heat and allow to cool for a few minutes.
4. Whisk egg white into the cooled peanut butter mixture until combined.
5. Fold peanut butter mixture into oats mixture and combine until moistened.
6. Pour into prepared pan, spreading and smoothing mixture evenly
7. Bake for 30-35 minutes, cool for 10 minutes in pan. Remove from pan and cool completely. Cut into 12 bars
PRINT ME