Friday, June 27, 2014

an island time dinner (recipe: shredded beef tacos & cabbage with carrot slaw)

We spent the first half of this week on the coast celebrating my parent's 40th wedding anniversary.  We went shelling, we dabbled our feet in the water, we played in the sand, we were knocked over by the surf and at times the salt water won.  The rain did not put a damper on our beach time, chilled by the raindrops, rapid wind stinging our skin and taking warmth in the waters of the gulf, oh no, it did not dampen our plans.  We were surrounded by our loved ones and enjoyed the sounds of the waves, each others company and of course great food.
Each family chose a night to host dinner.  I served a fiesta of skillet fajitas with rajas con crema, saffron rice, black beans, chips & salsa, and shredded beef tacos with cabbage & carrot slaw.  With the exception of cracking open the can of black beans and cooking the rice, everything was pre-made and reheated at the beach house.  I preferred to be on island time rather than kitchen time during my stay.
The shredded beef tacos were mighty delicious.  It is a fairly easy recipe that creates saucy, meaty, and intensely flavored tacos.  The cabbage and carrot slaw can be made up to 24 hours in advance and adds a fresh, bright flavor to the tacos.  A perfect balance of rich, robust meat filling and a crunchy punch of slaw made this taco a perfect island time meal.

Shredded Beef Tacos
serves 6-8
source:  Cook's Illustrated no. 127

Beef
1 1/2 cups Dos Equis, or other full bodied lager
1/2 cup cider vinegar
2 ounces dried ancho chiles, stemmed, seeded, and torn into pieces
2 tablespoons tomato paste
6 cloves of garlic, peeled and crushed
3 bay leaves
2 teaspoons ground cumin
2 teaspoons dried oregano
1/2 teaspoons ground cloves
1/2 teaspoons ground cinnamon
Salt & Pepper
1 large onion, sliced into 1/2-inch-thick rounds
3 pounds chuck roast, trimmed of excess fat and cut into 2-inch cubes

18 (6-inch) corn tortillas, warmed
4 ounces queso fresco, crumble
lime wedges
  1. Adjust oven rack to lower-middle position and heat oven to 325 degrees F.  Combine beer, vinegar, anchos, tomato paste, garlic, bay leaves, cumin, oregano, 2 teaspoons salt, 1/2 teaspoon pepper, cloves, and cinnamon in Dutch oven.  Arrange onion rounds in single layer on bottom of pot.  Place beef on top of onion rounds in single layer.  Cover tightly and cook until meat is well browned and tender, 2 1/2 to 3 hours.
  2. Using slotted spoon, transfer beef to a large bowl, cover loosely with aluminum foil, and set aside.  Strain liquid through fin-mesh strainer into 2-cup liquid measuring cup (do not wash pot).  Discard onion rounds and bay leaves.  Let liquid sit for 5 minutes and skim any fat off surface.  Add water if needed to equal 1 cup.  Pour liquid back into unwashed pot and blend with an immersion blender until smooth.  Alternatively, you can pour liquid into blender and blend until smooth.
  3. Using two forks, shred beef into bite-size pieces.  Bring sauce to simmer over medium heat.  Add shredded beef and stir to coat.  Season with salt to taste.  (Beef can be refrigerated for up to 2 days; gently reheat before serving.)
  4. Spoon small amount of beef into each warm tortilla and serve, passing slaw, queso fresco, and lime wedges separately.
Cabbage-Carrot Slaw
1 cup cider vinegar
1/2 cup water
1 tablespoon sugar
1 1/2 teaspoon salt
1/2 head green cabbage, cored and sliced thin (6 cups)
1 onion, sliced thin
1 large carrot, peeled and shredded
1 jalapeno, stemmed, seeded, and minced
1 teaspoon dried oregano
1 cup chopped fresh cilantro
  1. Whisk vinegar, water, sugar, and salt in large bowl until sugar is dissolved.  Add cabbage, onion, carrot, jalapeno, and oregano and toss to combine.  Cover and refrigerate for at least 1 hour or up to 24 hours.  Drain slaw and stir in cilantro right before serving.

Tuesday, June 24, 2014

25/52

You have traveled from the mountains to the sea this summer already.  You are such a great and patient traveler.  I hope to explore with you more and more as you get older.

Monday, June 23, 2014

the blue hour of twilight

In the blue hour of twilight
As the storm rolls in over the canyon
A mist cloaks the tall pines
There lies a heavy sorrow in its indigo hue
A mysterious wonder to behold
Secrets held in the prickly needles of the trees
And bound to the lichen covered granite
Waiting to be unlocked by the morning sun
Until then...

Saturday, June 21, 2014

a summer mountain morning

May this fine summer solstice day find you basking in the glow and warmth of sunlight

Tuesday, June 17, 2014

dr. pepper snacking cake

A week before Father's Day my son and I had this conversation, "Son, what would you like to get your dad for Father's Day?"  "Hmmmm, how about Dr. Pepper!"  "So....you want to buy your dad soda for Father's Day?  Nothing else?"  "No, I want a Dr. Pepper dinner-everything Dr. Pepper!"  "Hmmmm, that sounds like a great idea."  "LET'S DO IT!!!," he squealed.
For some reason the son thought Dr. Pepper soaked fruit was an excellent choice for dessert and I quickly suggested a Dr. Pepper Cake.  He promptly took me up on the offer.  Every good southern church cookbook or school fundraiser cookbook should contain at least 2-3 recipes for Coca Cola Cake.  It's a southern tradition and evidently the law according to what is found in the depths of my recipe archives. So why not Dr. Pepper Cake?  Just substitute one soda for another, right?  Right.
And so I did just that.  This cake has a very lovely and delicate chocolate flavor.  So mellow that it reminded me of an afternoon snacking cake.  I poured a thin layer of Dr. Pepper icing over the top rather than bombard the delightful little cake with a ton of icing and it became a perfect balance between cake and sweet icing.  It is addicting and seems to get better with time.  The crumb is moist and tender and it needs to leave my kitchen before I eat the entire thing.  I am a very weak person with no self control.  So make this and tell me just how strong you are. :)

Dr. Pepper Snacking Cake
yield:  9 servings

2 sticks butter
1 cup Dr. Pepper
1/4 cup cocoa powder
1 1/2 teaspoons cinnamon
2 cups flour
2 cups sugar
2 eggs
1/2 cup buttermilk
1 teaspoon baking soda
1 teaspoon vanilla
  1. Butter and flour an 8" square pan lined with parchment paper.  Preheat oven to 350 F.
  2. Melt butter and Dr. Pepper in a small saucepan.
  3. Meanwhile, sift together cocoa powder, cinnamon, flour and sugar into a large bowl.  Stir in the butter mixture and combine.
  4. In a separate small bowl or measuring cup, mix the eggs, buttermilk, baking soda and vanilla and add to the rest of the ingredients. Stir to combine.  Pour into prepared pan.
  5. Bake for 40-45 minutes until cake is done and cake tester comes out clean.  Cool in pan for 10 minutes.  Remove from pan and cool completely on cooling rack.
Dr. Pepper Icing
2 tablespoons butter
1 1/2 tablespoons cocoa powder
2 tablespoons Dr. Pepper (+1 Tablespoon if needed)
8oz. Confectioners Sugar
  1. Place butter, cocoa powder and 2 tablespoons Dr. Pepper into a small sauce pan.  Whisk over low heat until butter has melted.
  2. Place sugar in a medium bowl.  Add butter mixture and stir.  If mixture is too thick, add another tablespoon until icing is thick but pourable.
  3. Pour over cooled cake.

24/52

For Father's Day you decided to give your dad a Dr. Pepper Father's Day.  You asked me to make a Dr. Pepper dinner in which everything contained Dr. Pepper.  This is your expression when we cut into the Dr. Pepper cake.  I think you were ready for it.

Friday, June 13, 2014

before I was mom I was baker (recipe: cream cheese cinnamon rolls)

Before I became a mom I was a baker.  My alarm was set for 3:17 am every morning.  I'd roll out of bed, brush my teeth, slip on my chef pants and throw on a thread bare tee-shirt.  The thinner the shirt the better-if you can't stand the heat, wear breathable cotton.

I'd drive a few exits north, snow usually dancing on my windshield-it was Idaho after all and during long winters it wasn't abnormal to see snow during six of the twelve months.  During fire season the Bannock Range would glow from the small fires set by lightning strikes.  Those summer mornings were always different, lonelier and a little sinister with fire breathing down the hills.

Our crew would fall in one by one and begin making dough-a delicious homey white, a molasses spiked wheat, a dense french.  We'd mix, scale, cut, shape, proof and bake.  We'd make cookies, brownies and slab apple pie.  When you had proved yourself responsible, worthy and skilled you were given the opportunity to make the infamous cinnamon rolls our bakery was known for.

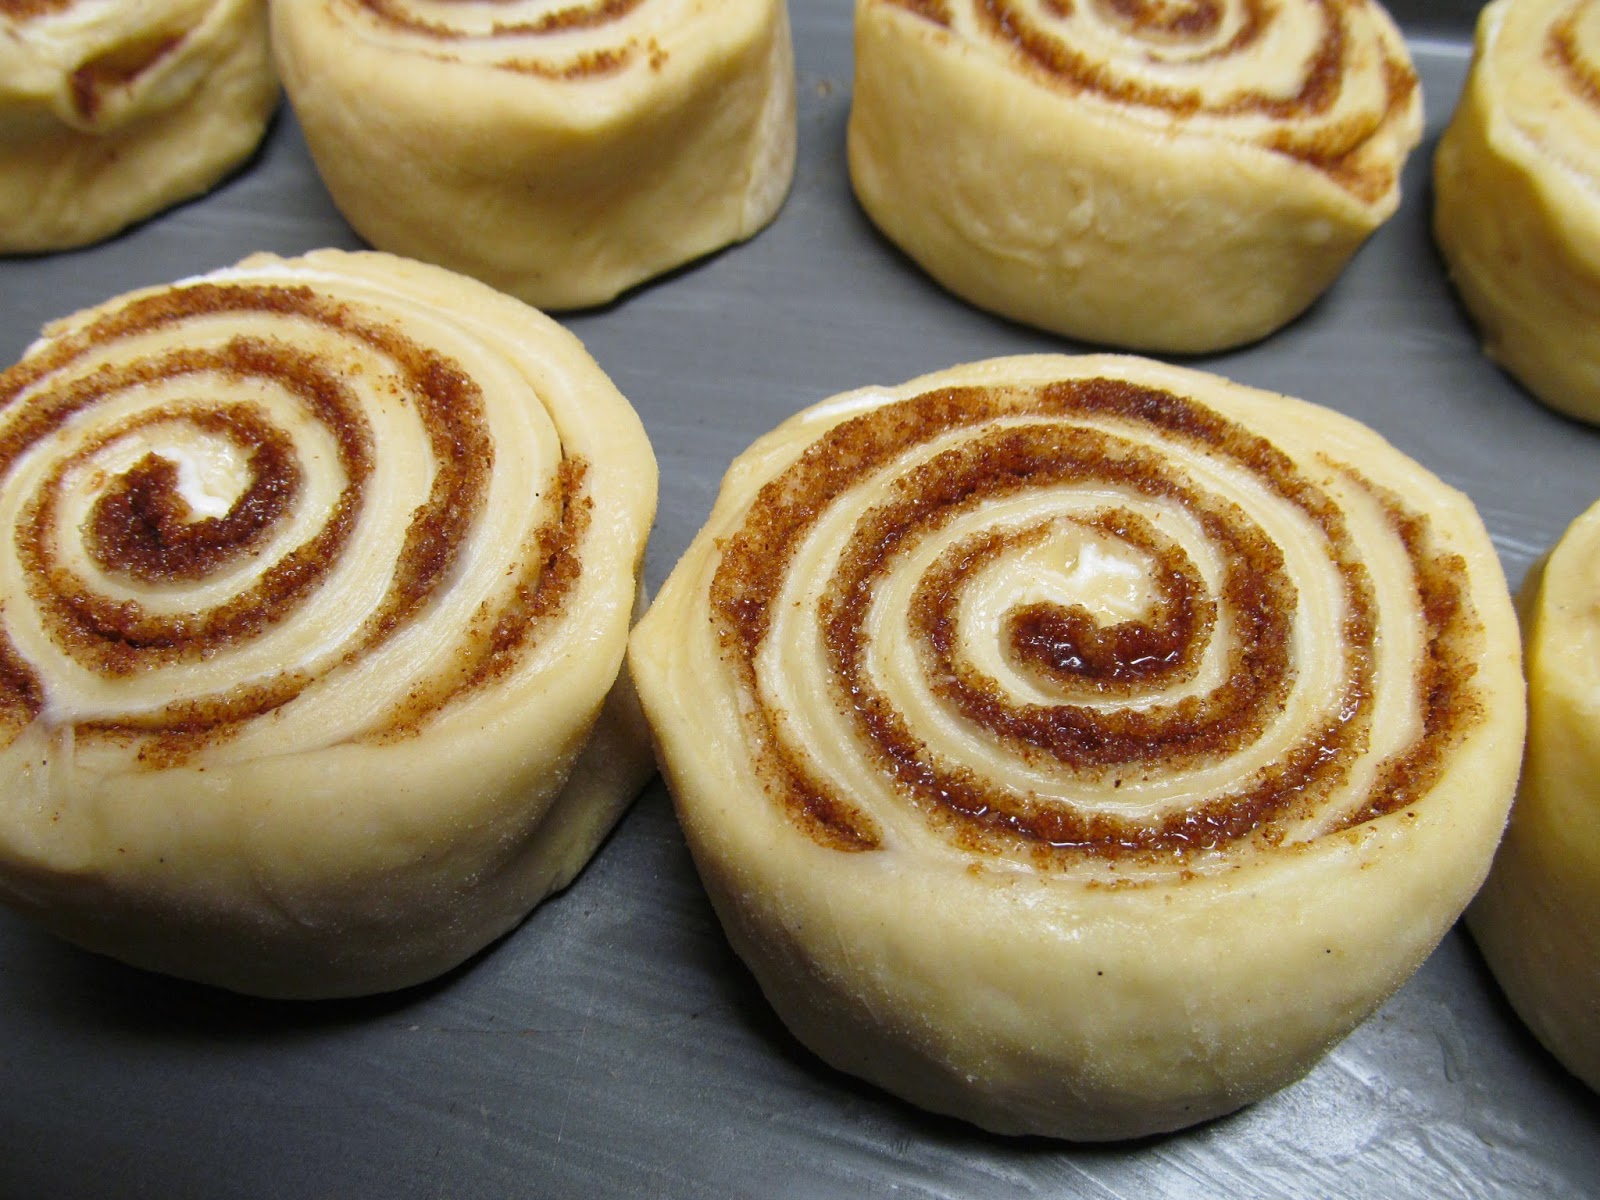
I began making cinnamon rolls only a few months after I began working at the bakery.  The first day I rolled out the dough, spread the cinnamon "schmear" onto the surface, rolled it up into a tight jellie roll and sliced them into perfect, uniform, spiraled buns just as I had learned years before in culinary school.  They were so beautiful.

As I laid them out onto the baking sheet the lead from the front of the house passed by, gazed at my cinnamon rolls and gasped.  I panicked a bit and asked what was wrong.  "Do we not make cinnamon rolls anymore?" she asked.  I pointed out my trays and explained that I had just shaped them.  "But they look like a machine made them, I was afraid for a moment that we were selling boxed cinnamon rolls from the freezer!"  I assured her that it was the exact recipe that had been used for over a decade, they just had a new baker in the kitchen.

When I make cinnamon rolls at home I still practice the techniques I learned from my chef instructor years ago, taking care of their uniformity, delicately forming that perfect cinnamon spiced spiral that twirls about the bread.  They are such beauties.

This recipe from Saveur incorporates cream cheese into the dough which adds a delicate tang, a certain richness, enhances moistness and mellows the filling.  The recipe is a labor of love and would be a perfect addition for a family breakfast, special occasion or holiday gift.  You can also make the rolls in advance and refrigerate them overnight-which is a great time saver when entertaining.  Tender.  Delectable.  Scrumptious.  You've got to give them a whirl.

Cream Cheese Cinnamon Rolls

source:  Saveur, Issue 114


FOR THE DOUGH:
1 (¼-oz.) package active dry yeast
½ tsp. plus ¼ cup sugar
½ cup milk, at room temperature
2 tbsp. light brown sugar
½ tsp. vanilla extract
1 egg
1 egg yolk
2¾ cups flour, sifted, plus more for kneading
¾ tsp. fine salt
8 tbsp. unsalted butter, at room temperature, plus more for the pan

FOR THE FILLING:
½ cup sugar
¼ cup dark brown sugar
1 tbsp. ground cinnamon
½ tsp. fine salt
⅛ tsp. ground cloves
2 tbsp. maple syrup
4 oz. cream cheese, at room temperature
8 tbsp. unsalted butter, melted

FOR THE ICING:
2 cups confectioners' sugar
¼ cup buttermilk

1. Make the dough: In the bowl of a standing mixer fitted with a hook, combine yeast, ½ tsp. of the sugar, and ¼ cup water heated to 110°. Stir to combine and let sit until foamy, about 5-10 minutes.

2. Add remaining sugar, milk, light brown sugar, vanilla, egg, and egg yolk. Beat on low speed until thoroughly combined, 1 minute.

3. Turn mixer off and add the flour and salt. Mix on medium speed until the dough just comes together. Turn mixer speed to high and knead dough for 4 minutes. Add the butter and continue kneading until dough is smooth and pulls away from the side of the bowl, about 6 minutes. Remove bowl from the mixer, cover with plastic wrap, and set aside in a warm place. Let the dough rise for 1 ½–2 hours, until it has doubled in size.
4.  Make the filling: Combine the sugar, dark brown sugar, cinnamon, salt, and cloves in a large bowl; stir to combine. Stir in the maple syrup. Set filling aside.

5. Punch the dough down and turn it out onto a heavily floured surface. Gently knead the dough until it's no longer sticky, adding more flour as necessary, about 1 minute. Using a floured rolling pin, roll the dough into a 10" x 10" square. In a small bowl, beat the cream cheese with a rubber spatula until it's smooth and spreadable. Spread the cream cheese evenly over the dough square; then fold square into thirds as you would fold a letter to fit it into an envelope. Take the open ends of the resulting rectangle and fold into thirds again, to make a smaller dough square. Invert the dough so that the seam is face down and, using the rolling pin, gently roll into a 10" x 20" rectangle.

6. Turn the dough so that the short sides are parallel to you. Brush the top of the dough with half of the melted butter. Drizzle the reserved filling over the dough, leaving a 1" border at the edge farthest away from you. Lightly press the filling into the dough. Using your hands, lift up the bottom edge of the dough and roll it forward into a tight cylinder. Place dough cylinder, seam side down, on a cutting board and, using a thin, sharp knife, trim off the ends; cut cylinder crosswise into 8 equal-size slices. Nestle the slices, cut sides up and evenly spaced from one another, into a buttered 9" x 13" light-colored metal baking pan. Cover pan with plastic wrap and set aside in a warm place to let rise for 2 hours. (Alternatively, the rolls may be refrigerated overnight.)

7. Heat oven to 375°. Uncover the rolls. (If refrigerated, let them sit at room temperature for 15 minutes.) Bake until golden brown and a toothpick inserted in the center of the rolls comes out clean, about 30 minutes.

8. Make the icing: While the rolls are baking, whisk together the sugar and buttermilk in a small bowl until smooth.

9. Transfer the pan of cinnamon rolls to a cooling rack; brush with remaining melted butter. Let cool for 5 minutes. Dip the tines of a fork into the icing and drizzle all over the rolls. Serve immediately.

Wednesday, June 11, 2014

unsettling isolation

As we snaked our way through Roosevelt National Forest, climbing to soaring heights, deeper into the woods, an uneasiness poured through me.  We were so far from everything and everyone.  I spotted only a handful of strangers sharing the lonesome road our mountain cabin was on.  There was nothing but us, the trees, quick rushings of a river and birdsong.  Isolation was what I sought but once I had it I began to second guess my wishes.

During my childhood we would camp in the backcountry.  I didn't realize that my family were such rugged backcountry campers until my adulthood.  But I knew I loved it.  Our family was one with the woods, mountain air and campfire.  Washing the river rock off of ourselves from a solar heated camp shower that hung from the trees, we were a part of the earth.   No one was around for miles.  As a child and early teen I never gave the isolation and the distance from civilization a second thought.  I enjoyed the moment.

But now, when every vile, horrific moment is at a click of a button or highlighted during the first ten minutes of the morning news-I am aware of things I wish I was not.  Awareness-one of the sad misfortunes to acquire when one becomes an adult.  I walked into the warm knotty pine glow of our cabin with hesitation hovering over me.  Aggravated with myself I realized my fault, the lack of trust between me and the unknown, between me and the silence.  I didn't know my one short term neighbor across the way nor did I know the area that well and the quick whispers of "what ifs" began to rush through my head.

As the day faded into night I slowly settled into place. I began to focus on the grand beauty of what was before me.  I was not afraid anymore.  I opened the door and welcomed the cold mountain air and whatever else it brought with it.  I nestled into the unknown, the isolation and silence and finally after many years my mind was clear and free of the world's happenings, swept away with the gentle rapids of the river.


Monday, June 2, 2014