Showing posts with label Condiments and Sauces. Show all posts

Monday, September 30, 2013

kale pesto

I just wanted to share this quick pesto recipe as a segue to a baked pasta I had made earlier this past summer.  As October brings us cooler weather and the sun rests to slumber earlier and earlier each day, kitchens are sputtering with rich soups and luscious stews; braised meats; pumpkin treats and rich and hearty baked pastas.  The aforementioned baked pasta will be featured in a few days, but for today I will be featuring a key ingredient to the dish, kale pesto.

Pesto is rather simple to make.  It is a raw sauce traditionally containing basil, garlic, pine nuts, olive oil, Parmesan and/or Pecorino cheese.  The marriage of these ingredients are whirled up in a blender within seconds to create a bold, brightly colored and versatile sauce.  Pesto can be spread on bread, mixed with vegetables and salads, swirled in soup, combined to make a party dip, or tossed with pasta.  It is a great staple to have in your kitchen and you can freeze pesto for later use.

This recipe is an especially tasty way to enjoy kale.  Kale Pesto has a garden fresh, garlicky and cheesy flavor that is quite reminiscent to the traditional basil pesto, it is just the high fiber cousin to our beloved herbed favorite.  This recipe makes a small batch of pesto but can easily be doubled.

Kale Pesto
yield:   4-6 ounces
  • 1/4 cup pine nuts & walnuts (I used 75% pine nuts to 25% walnuts) or just pick your favorite nut out of the two and not combine them.
  • 1 cup packed fresh kale
  • 2 small garlic cloves
  • pinch of salt
  • 2 tablespoons freshly grated Parmesan cheese
  • 2-4 tablespoons extra virgin olive oil
  1. Place pine nuts and walnuts in a dry skillet and toast over medium low heat until fragrant.  Remove and set aside.
  2. Add kale, garlic, salt and toasted nuts into a bowl of a food processor fitted with a metal blade.  Blitz it until kale is coarsely chopped.  Add cheese and pulse until incorporated.
  3. Slowly pour olive oil into the food processor and whirl the ingredients together until the desired consistency is met.
  4. Adjust the seasonings and store in the refrigerator sealed in an airtight container for a week. You may also freeze it up to 6 months.  To maintain a fresh green looking color, drizzle a thin layer of olive oil on top before storing.


Wednesday, July 10, 2013

Slow Summer (Recipe: Small Batch Blueberry Lime Jam)

Ranch land near Brenham, TX
A few weeks ago I couldn't help but to admire the sky as we were driving home from Houston.  Cottonball clouds were perfectly hoisted in the air and as we passed by pastures and ranch land I briefly (and yet again) fell in love with green and blue.  The colors blurred with such contrast as we zoomed down the highway, yet they were so complimentary; no wonder why God chose these colors to represent our Earth.  They are magnificent.
A healing Earth, Bastrop, TX
The sun was setting as we passed through the battled and scarred land in Bastrop.  Burned from a forest fire two years this fall, the trees were charred sticks standing at attention.  I quickly reminded myself that the land would heal itself, that the scorched earth would once again be enriched and green again.  A proud green reaching for the blue sky.
Skies over Houston
There is something so great about summer drives.  The days seem slower and I feel a release.  There is no rush.  There are slow sunsets.  There are rivers and lakes.  Bridges to cross.  Canoes and kayaks.  Farmstands and markets.  Music.  We are in the midst of summer.  Lets keep it slow.

Now on to a slow summer recipe....
Blueberry Lime Jam

Blueberry Lime Jam (small batch)
yield:  approximately 2 cups (I processed 1-1/2 pint and 1-4oz jar and stored the remainder (scant 4oz.) in the frig)

Dusky sweet blueberries and bright, tart lime make a delicious, glistening, indigo summer jam.  I make jam the old fashion way, no pectin, just fruit, sugar and flavorings, heat and time.  I macerate the fruit for a few hours, mash the fruit up really well and gently boil it until it has thickened to my preferred jam consistency.  The flavors are pure and clean and this method of jam making is perfect for a slow summer day.

This recipe is for a small batch of jam but you can absolutely double, triple, or even quadruple the recipe.  I loosely use a jam formula of 2:2:2 (2 lbs fruit to 2 cups sugar to 2 Tablespoon lemon juice), in this case though, I used what I had in the frig. which was 20 oz.  You can always add flavorings, herbs, etc. and fiddle with the consistency to your preference.  I am a firm believer of the freezer/gel test and if you have any questions regarding canning go here or here.  Or you can read my little blurb about canning here.

20 oz. blueberries
1 1/4 cup sugar
Zest of two limes
Juice of one lime (a little over 1 tablespoon)
  1. Combine blueberries, sugar and lime juice and zest together and let it sit out at room temperature for 2 hours.  Alternatively, you may store the mixture in the refrigerator overnight. Stir occasionally
  2. Wash and sterilize jars. Boil the flat parts of the lids in a small pot and keep at a low simmer (I toss in the bands too).
  3. Mash the blueberries with a potato masher and place in a large heavy bottomed saucepan.
  4. Place on a burner over medium high heat and bring to a rolling boil. Stir and boil for 1 min.
  5. Lower heat and gently boil for 20-25 minutes, stirring occasionally at first then more frequently toward the end.  Perform the gel test to see if jam is ready to be processed.
  6. Ladle jam into hot jars, then place the lids on jars, and add screw rings.
  7. Immerse jars in hot water bath, and boil rapidly for 10 minutes, covered. Turn off heat and let jars sit in pot for 5 minutes, uncovered.  Remove from bath and place on a towel on the counter to cool.

Sunday, June 30, 2013

BBQ Sauce & Baked Creamed Corn

Are you ready for The Fourth?  Are you hosting or will you be a party guest?  What are you going to make or bring to the potluck?  If you haven't decided, may I suggest these two recipes.  My spicy BBQ sauce is darn good.  Sweetness from maple syrup, spice from the chipotle adobo sauce and lots of cracked black pepper.  It is absolutely delicious with these Oven Roasted BBQ Ribs.

I have a love for creamed corn.  Not just any old creamed corn though.  I have a love for J. Cody's corn and Tony's BBQ baked corn; a love so dear that I could be completely content just eating a vat of their corn and skip the meat.  That's right, corn for dinner.  What I believe the two of these recipes have in common and the reason I love them both is because of the addition of beer to the corn-yes, beer.  So, my mom and I fiddled around with all versions of creamed corn and this is what we came up with...it is very close.  Close enough, I could eat a vat of it!  Happy Fourth!

Cozy Bee's Spicy BBQ Sauce
makes 8 ounces.

1 cup ketchup
1/4 cup maple syrup
1/4 cup dark brown sugar
2 tablespoons Dijon mustard
3 teaspoons adobo sauce
1 teaspoon apple cider vinegar
Cracked Black Pepper

1.  Whisk all ingredients together.
2.  Simmer whisking occasionally until sauce has reduced to 1 cup, 10 to 15 minutes.

Baked Creamed Corn
yield:  2 quart casserole

1 (8 oz.) package cream cheese
1/2 cup butter
37 ounces canned corn, drained
1 large jalapeno, diced
scant 1/4 cup beer
salt & pepper
  1. Preheat oven to 350 degrees F.
  2. In a microwavable bowl, microwave the cream cheese and butter until butter has melted and cream cheese has softened, about 3 minutes.  Whisk until mixture is smooth and lump-free.
  3. Add corn, jalapeno and beer and stir until combined.  Adjust seasoning with salt and pepper.  Pour into a 2 quart casserole dish.
  4. Bake for 30-40 minutes, until bubbling.
  5. Remove from oven and let creamed corn set for 15 minutes until it thickens a bit.

Wednesday, March 13, 2013

*


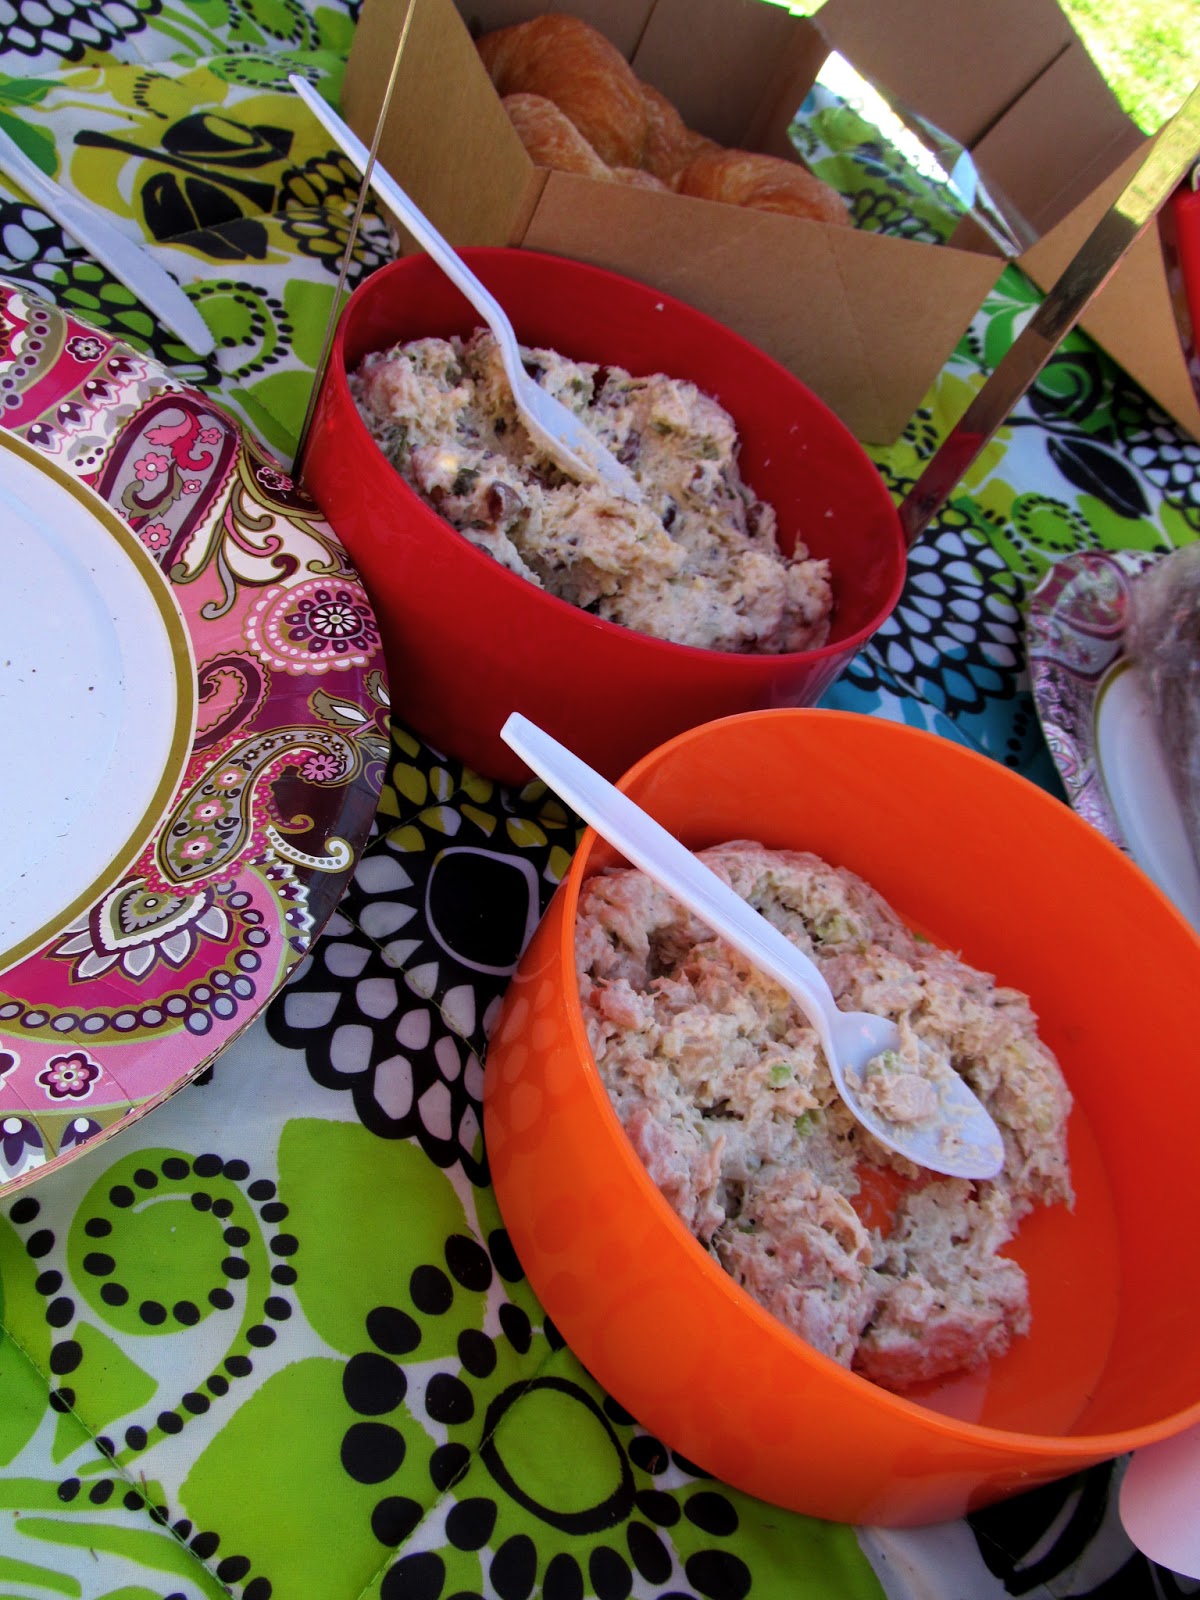
The Best Tuna Salad (slightly adapted)
source:  Cooks Country
yield:  2 cups or four sandwiches

3-(5 ounce) cans solid white albacore tuna packed in water
1 large shallot, minced
2 tablespoons olive oil
2 teaspoons lemon juice
salt and pepper
1/2 teaspoon sugar
1/2 cup plus 2 tablespoons mayonnaise
1 celery rib, chopped finely
  1. Marinate Tuna:  place tuna in a fine-mesh strainer and press dry with paper towels.  Transfer to medium bowl and mash with fork until finely flaked.  Microwave shallot and oil in small bowl until shallot begins to soften, about 2 minutes.  Cool slightly, about 5 minutes.  Combine onion mixture, lemon juice, 1/2 teaspoon salt, 1/2 teaspoon pepper, and sugar with tuna and let sit 10 minutes.
  2. Finish Salad:  Stir mayonnaise and celery into tuna mixture.  Season with salt and pepper.  Serve.  (Can be refrigerated in airtight container for 1 day.)
*Note:  We love Wild Planet Tuna and Hellman's Mayonnaise-they are dynamite in this tuna salad


 Spiced Nuts
6 ounces pecan halves
4 ounces whole almonds
4 ounces cashews
4 ounces walnuts
2 sprigs fresh rosemary, chopped
1/4 teaspoon cayenne pepper
2 teaspoons dark brown sugar
2 teaspoons kosher salt
1 tablespoon butter, melted
  1. Preheat oven to 350 degrees F.  Place nuts on a baking sheet and toast in oven for 10 minutes, or until light brown.
  2. Combine cayenne pepper, brown sugar, salt and melted butter in a large bowl.
  3. Toss warm nuts into the bowl with melted spiced butter.  Toss until coated.  Serve warm or pack it up in a take-out container and go on a picnic!
**You can find Pumpkin Chocolate Chip Bread here.  Need something to drink?  This lemonade rocks!!!

Friday, November 30, 2012

A Gingerbread Morning (recipe: Gingerbread Pancakes w/ Lemon Syrup)

The morning began with pancakes.  Not just any old pancake, but gingerbread pancakes.  And lemon syrup.  This is how we welcomed Christmas into our home this year.  After breakfast we lit the tree, draped garland down the staircase, placed ornaments on the tree and hung our stockings.
As Eli grows older with every season, he is more understanding.  Understanding and excited and may be Christmas' biggest fan.  I find him under the tree laying, looking up into the lights and watching the gentle sway of ornaments just as I had when I was a kid.  He asked to sleep there for the night but I don't think the cat will let him.  He has his own tiny tree in his room.  It is lit, placed on his art table and decorated with tiny Santas, Snowmen & Nativity characters.
I love the fact that he knows Christmas celebrates Jesus' birth, the star that sits atop the tree represents the Star of Bethlehem, and that we give and receive gifts in honor of the king's gifts to the Christ child.

Speaking of gifts, all he has asked for is a hippopotamus...yes, just like the song.

Gingerbread Pancakes
Perfect for a Christmastime breakfast.  Serve with maple or lemon syrup.  These delicate pancakes darken quickly because of the molasses, and they don't bubble as much as plain buttermilk pancakes.  So please do be aware and careful.
 
makes about 16

1 3/4 cups flour
1 1/2 teaspoons baking powder
1 1/2 teaspoons baking soda
1 1/4 teaspoons ground ginger
1 1/4 teaspoons ground cinnamon
3/4 teaspoon allspice
1/4 teaspoon nutmeg
1/4 teaspoon salt
2 cups buttermilk
2 large eggs
2 tablespoons butter, melted
2 tablespoons golden brown sugar
2 tablespoons pure maple syrup
2 teaspoons molasses

6 tablespoons butter
  1. Mix flour, baking powder, baking soda, ginger, cinnamon, allspice, nutmeg, and salt in large bowl.  Add buttermilk, eggs, melted butter, brown sugar, maple syrup, and molasses.  Stir until blended.
  2. Melt 1 tablespoon butter in heavy skillet over medium heat.  Working in batches, drop batter by 1/4 cupfuls into skillet.  Cook pancakes until golden and cooked through, adding more butter as necessary, about 2 minutes per side.  Transfer to plates and serve with lemon syrup.
Lemon Syrup
make 1 1/2 cups

1/2 cup sugar
1 tablespoon cornstarch
pinch of salt
1/4 teaspoon nutmeg
1 cup boiling water
1 tablespoon butter
zest & juice from one lemon
  1. In a large saucepan, rub sugar, cornstarch, salt & nutmeg together with your hands (this prevents lumps formed by cornstarch).  Gradually stir in boiling water, then simmer over low heat until thick, stirring constantly.
  2. Remove from heat; stir in butter, lemon zest and lemon juice.  Serve.

Monday, November 26, 2012

The trees have decided

"The trees have decided," my husband said nonchalantly as we were driving to my aunt's house for Thanksgiving.  He didn't specify what the trees had decided on, but it was evident in their colors.  This then led to a small talk of how trees, a living thing, are great story tellers.  Stories of children climbing them, camp outs in tree houses, picnics eaten under them.  Stories of bird's song, the wind's anger and rebirth every spring.  My husband is as literal as they come, and of course looked at me like I was crazy. 

I hope everyone had a wonderful Thanksgiving break.  We traveled to Lake Conroe and enjoyed a wonderful family get-together.  We enjoyed the traditional turkey fare, listened to stories my dad and uncles shared, went foraging for pinecones and watched Eli and his cousin play, romp, wrestle and hug.  Those two boys play and love so purely and freely.
Thanksgiving dog & young buck
Being that we traveled a good ways I didn't really make anything that needed to be reheated.  I brought a cooler filled with cranberry sauce and sangria.  Both recipes were from one of my new favorite food blogs, SpoonForkBacon.

I love cranberry sauce, and I especially love the Spiced Cranberry sauce from SpoonForkBacon.  Click the link for the recipe.
Spiced Cranberry Sauce in the making
Spiced White Wine Sangria
recipe courtesy of SpoonForkBacon.com
Makes 2 quarts


2/3 cup sugar
2/3 cup water
2 cinnamon sticks
3 star anise
3 cardamom pods, lightly crushed
1 (750ml) bottle pinot grigio
2 tangerines, thinly sliced
2 tablespoons light brown sugar
1 cup pomegranate seeds
optional garnish:
cinnamon sticks
star anise

1. Place sugar, water, cinnamon sticks, star anise and cardamom pods into a small saucepan, stir and simmer until the sugar has dissolved. Remove from heat and allow the mixture to cool to room temperature.
2. While the spice simple syrup cools, spread tangerine slices onto a baking sheet and sprinkle the tops with a small amount of brown sugar.
3. Place the baking sheet under a broiler for 2 to 3 minutes or until caramelized.
4. Place the orange slices and pomegranate seeds into a large pitcher.
5. Pour the wine over the fruit and add extra cinnamon sticks and star anise, if desired.
6. Add the simple syrup into the pitcher and stir until well combined.
7. Place the sangria in the refrigerator and allow to chill for at least an hour. Pour into glasses and serve

Monday, January 16, 2012

Bowl Game Recipe: Jalapeno Ranch Dip

Unfortunately our beloved Houston Texans will not be moving on to the conference championship or the Superbowl for that matter.  We (and when I say we, I mean my husband) are Dallas Cowboy fans by heart, but we will always support any team representing Texas!

I really love bowl game food.  Pizza, lil' smokies drenched in BBQ sauce, buffalo wings and tons of chips and dips.  This Jalapeno Ranch Dip is cool, fresh and lends some heat from the jalapeno.  You can make it as spicy as you'd like by adding more peppers.  My MIL likes about 3-4 peppers added to the dip and my FIL drizzles it over his salad.  It is an easy, versatile and scrumptious recipe and would be a great addition to that Superbowl party you'll be attending.

Jalapeno Ranch Dip
1 1/3c. mayonnaise
1/3 c. buttermilk
2 jalapenos, finely diced
1/3 c. canned diced green chiles, drained
1/3 c. cilantro, chopped
1 package dry ranch dressing mix
  1. Combine all ingredients into a bowl and stir until incorporated.  Chill.
  2. Serve with tortilla chips
***You can also use this dip for a wonderful salad dressing.  Just thin it out a bit with water.

Wednesday, August 31, 2011

It has dirt in it (Recipe: Spiced Peach Jam)

My first job in the food industry was in the bakery/pastry department at Central Market-Houston.  Central Market is a phenomenal grocery store concept which was inspired by fresh produce markets, Seattle's fish markets, French Boulangaries and pastry shops, quaint cheese shops and all things food.  It is an experience and should be a destination for any foodie visiting the great state of Texas.  If you don't take my word for it, maybe you'll take his.

I had the great opportunity to work there during its grand opening.  Houston was very receptive to us and it was such a grand event.  I mean its a building full of foodies-you would expect for us to throw a great party.  Our weekday customers were primarily area foodies, chefs, local TV personalities, pro athletes & coaches, white collar workers on their lunch break and the wealthy River Oaks residents who lived just blocks away.

On the weekends, however, it became a madhouse.  We were bombarded with non-foodies...sample seekers, if you will.  Folks who had never sliced through an artisan loaf, tasted an aged English Cheddar, or gazed upon a star fruit would treat our store like an amusement park.  They were the people who would call our Pain de Campagne, "Champagne Bread", say "Grand Mariner" instead of Grand Marnier and pronounce Boule as "Boo-lee".  Weekends obviously made us smile.

One day I was working behind the pastry counter when a very irritated woman slammed her empty creme brulee cup onto the counter.  "I have a problem with the 'Cream Brew-lee'!  It has dirt in it!"  As I looked into her cup I cracked a slight smile.  "Ma'am, you shouldn't worry, you didn't eat any dirt.  Those are vanilla beans."

Since then, every time I slice a plump, fragrant pod in half, or see tiny flecks of vanilla in my desserts, I crack a smile and think about that "dirt."  Just as I did making this Spiced Peach Jam.

Spiced Peach Jam (and yes, it has dirt in it)

4 pounds peaches
4 cups granulated sugar
1/4 cup lemon juice
2 cinnamon sticks, each 3 inches long
1/2 teaspoons ground cardamom
4 whole cloves
  1. Prepare an ice water bath for the peaches.  Etch an X at the bottom of each peach.  Bring a large saucepan of water to a boil.  Working in batches, add peaches and blanch for 30 seconds.  Using a slotted spoon, transfer the peaches to the bowl of ice water.  Drain the peaches, then peel, halve and pit them.  Working over a large, saucepan, cut the peaches into chunks, allowing their juices and the chunks to fall into the pan.  Stir in sugar, lemon juice, cinnamon, cardamom and cloves.  Let stand for 1 hour.  (I macerated mine overnight)
  2. Place the pan over medium heat and cook, stirring, until the sugar dissolves.  Raise the heat and bring to a slow boil.  cook uncovered to the jelling stage, stirring occasionally at first and then more frequently near the end of cooking, about 30 minutes.  Perform the gel test to check to see if jam has cooked long enough.
  3. Meanwhile, wash canning jars and lids in hot soapy water; rinse well.  Fill the jars with hot water.  Put the lids in a pan with water to cover and bring to a simmer.  Remove from the heat.
  4. Drain 1 jar.  Remove cinnamon sticks and clove if you'd prefer.  Spoon in the hot jam to within 1/4 inch of the top.  Using a hot, damp towel, wipe the rim clean.  Drain 1 lid and place on the jar; seal with the screw band.  Repeat with the remaining jam and jars.  Follow these directions, process the jars in a hot-water bath, check seals, label and store.  (If keeping no longer than 3 weeks, omit the water bath and store in the refrigerator.)

Monday, August 15, 2011

Barbecued Chicken Breasts with Spicy Peach Glaze

My living room looks like a battlefield.  We had laid a sleeping pallet and pillows down upon the floor and camped there all day Saturday.  The Baking Tot had once again fallen ill from a stomach virus and we all piled together for snuggles, comforting hugs and movie time.

Initially, I was hoping for a different kind of weekend-one with family time, a day trip and a big family dinner, but as I was leaning against my son, who was laying on my husband, while the cat was curled up at my feet, it hit me...this is what I wanted after all.  Unfortunately it was at the expense of the Baking Tot's stomach.

As our night drew to a close, my husband and I heard an all too familiar sound.  A sound we hadn't heard in months...rain.  I ached to go outside so I could feel it, listen to it spatter upon the concrete, smell it, but it was late and my son was drifting asleep in my arms.  According to a neighbor, many did convene on their porches to witness this rarity, some may have even cheered.

Poor central Texas has fallen to a nasty, blazing, dry summer with temperatures in the triple digits.  We have only whipped out the barbecue pit once this summer and it was well worth it.  We deserve a perfect summer meal just like the next person and here is what we had:  pasta salad, corn fricasse, barbecued chicken breasts with spicy peach glaze and ice cold lemonade.  I suppose grilling this summer is as much a rarity as the rain, but at least we had one perfect summer meal on the coolest day of the season (I think it was 99 degrees).

Here's hoping for more rain and maybe a cooler day for grilling.


Barbecued Chicken Breasts with Spicy Peach Glaze
Great Parties, The Best of Martha Stewart Living

serves 8

1 cup peach preserves or jam
1 large clove garlic, minced
2 tablespoons olive oil
1 tablespoon plus 1 teaspoon soy sauce
1 tablespoon dry mustard
1/4 teaspoon cayenne pepper
1 teaspoon salt, plus more to taste
1/4 teaspoon freshly ground black pepper, plus more to taste
4 chicken breasts, split (about 5 pounds)
4 ripe peaches, cut in half and pitted
  1. Heat a grill to medium hot  In medium mixing bowl, combine the preserves, garlic, olive oil, soy sauce, dry mustard, cayenne pepper, salt, and black pepper, and mix well to combine.
  2. Sprinkle chicken breasts with additional salt and pepper, and place skin-side down, on the grill.  Cook the chicken about 10 minutes on each side before brushing the upturned side with glaze.  Continue cooking the chicken for another 10-12 minutes, turning it every 3 to 5 minutes and brushing each upturned side with glaze every time, until chicken is cooked through.  Move chicken to oven or a cooler part of grill if it gets too dark before it is cooked through.
  3. Place peach halves on grill, cut-side down, and grill for 2 minutes.  Turn, and brush tops with glaze.  Grill 3 to 4 minutes more, until  peaches are soft and cavities fill with juices. Transfer cooked chicken and peaches to a serving platter.
***We used 4 boneless skinless chicken breasts and omitted the grilled peaches, cutting cooking time just a tad...it's just too darn hot out there!!!
****This chicken is even better served cold the following day!


Monday, August 8, 2011

Jam Session Part Deux: Peach Jam

I had a pretty good weekend.  I guess you could say it was down right peachy (yes, I feel nerdy typing that).  Thanks to my neighbor, her daughter, and the peach tree on the corner of our street, I was the lucky recipient of seven pounds of freshly picked peaches.  My neighbor made a small request for jam and I had no hesitation following through.  This morning as I was sitting in my kitchen listening to the pot sputtering away, I quickly remembered the first time I had ever made jam.

Eight years ago I went a little overboard and purchased a myriad of strawberries from our produce market.  Standing in my tiny kitchen, the abundance of beautiful red berries over shadowed the outdated harvest gold appliances and sent my mind in a quandary.  With the ridiculous amount of berries standing before me, my husband and I would be eating shortcake for weeks!  What else was I going to do with those tiny, sweet, red jewels?  As I rifled through cookbook after cookbook I came upon a recipe for Ponchatoula Strawberry Jam (Ponchatoula is the strawberry capital of Louisiana-errrr, or the world if you are from there-you can thank me for the history lesson later).  I had never made jam and was very hesitant to do so.

Wasn't special equipment needed?  Did I have to go out and buy a ginormous canning pot?  A jar lifter?  As a lowly paid pastry cook and new wife of a grad student (which meant we still lived like college students), I could not justify buying all of this equipment for a few jars of strawberry jam.  Guess what...I didn't have to buy all of that stuff after all.

Monday, June 27, 2011

Jam Session: Spiced Plum & Vanilla Preserves

An act of kindness can go a long way. One evening I took a stroll with Baking Toddler and came upon an elderly man tending to his vegetable garden. I had admired his garden many times and decided to stop and compliment his hard work. After a short conversation, he offered me fresh plums from his tree and I immediately accepted.

I was so happy with my bag of tiny, sweet, red plums and knew exactly what to make. Spiced Plum & Vanilla Preserves-a recipe I had been eyeing for years! Turns out it is the...Best. Jam. Ever. Out of the jellies and jams I've made in the past, this is by far the most delectable.

I packaged up a jar of the ruby colored jam and delivered it to the kind man's door. His daughter answered and seemed so happy (and surprised) to receive my gift of appreciation. They quickly offered me more plums and invited me back for figs later on in the season. It seemed like my act of kindness had worked full circle.

This is an amazing recipe with several layers of flavor. There is a natural sweetness from the fruit, a hint of citrus, spice from the cloves and warmth from cinnamon and vanilla. This crimson jam, full of depth and flecked with vanilla beans reminds me of Christmas...hmmm...Christmas gifts???  Ehhhh, this might even be too good to share. :)

Monday, June 20, 2011

Summer Breakfast Series (Recipe: Ricotta Doughnuts with Blueberry Compote)

This is a recipe that is just plain fun to make.  I hadn't had this much fun in the kitchen since dabbling in homemade ricotta (which of course I used in this recipe).  I just loved watching the globs of dough transform into beautifully fried golden orbs. There was something about the whole process that made me very excited-maybe it was the frying, or it could have been shaking the warm doughnuts in the sugar filled paper sacks and eating them straight from the bag (yes, I did that)!

Not only were they enjoyable to make but they were fun to eat as well.  I thought it would be something different to serve for my guests-I mean really, how often do you ever eat homemade doughnuts? I served them two ways, one tossed in cinnamon sugar served with a blueberry compote (my favorite), the other half was coated with confectioners sugar (kids and kids at heart favorite).

Wednesday, April 27, 2011

The Taste of a Place-Tomato Salsa

Is it strange that I consider chips and salsa as one of my favorite comfort foods?  Not pot roast, not a roasted chicken but salsa...red salsa.  Tomatoey, flecked with garlic, onion and cilantro, spiced with jalapenos and scented with lime-I could eat chips and salsa for dinner alone and be quite content.

When my husband and I uprooted from Texas and moved to Idaho we found ourselves eating Mexican food at least once a week.  Our favorite and best Mexican food establishment in town did not serve chips and salsa and it killed me. We sometimes would settle for another restaurant (though not the best or our favorite) because they had chips and salsa.  And with one bite it sent me home.  In that moment I knew chips and salsa was one of my favorite foods of comfort.

Monday, March 28, 2011

In The Freezer: Tomato Sauce

It wasn't until a month before the birth of my son that my freezer was stocked to the brim for the first time in my adult life.  It almost felt like some sort of grown up accomplishment, a milestone if you will.  My husband and I never really took advantage of freezer space and quickly discovered that once you have a child there is more to a freezer than the storage of ice cubes and occasional cartons of ice cream.

Soon I found bread, doughs, mac n cheese, casseroles, proteins, fresh berries, condiments, frozen pops and sauces stacked upon the freezer shelves.  One staple I always have on hand is tomato sauce.  Though not a meal in itself, it is a perfect springboard to make a quick and tasty meal.  From a simple tossing of sauce and noodles to a quick chicken parmesan this is one of my go-to recipes for a delicious family dinner.

Now the sauce.  I had been a big fan of Giada's marinara sauce...and then I had a kid...and then I didn't want to take the few extra minutes to chop onions, garlic, carrots, and a celery stalk.  Yes, I had become lazy and maybe a little boozy because I was craving a sauce that had a little extra bite from wine.  Luckily I found this recipe from an ancient MS Living magazine.  This sauce is sweet with a little heat from the pepper, has a good bite from the wine and added freshness from the fresh herbs.  Not to mention it is a dump, cook, serve, store, freeze kind of recipe...a winner for this mama!
Sneak Peak!!!  Look what's coming on Wednesday!
Traditional Italian Tomato Sauce
adapted from: Mark Strausman, owner and chef, Campagna
makes 9 cups

4-28 ounce cans crushed tomatoes
1/4 cup extra virgin olive oil
3 cloves garlic, thinly sliced
1 teaspoon crushed red pepper
1 cup Chianti or other dry red wine
1 tablespoon dried oregano
8 leaves fresh basil
Salt and Pepper
  1. In a medium stockpot, heat olive oil over medium heat.  Add garlic, and saute until golden brown, 1-2 minutes.  Add red pepper flakes.  While oil is sizzling, slowly add half of the tomatoes.  Add wine, stirring to combine.  Add remaining tomatoes.
  2. Reduce heat.  Add the oregano, and simmer, stirring occasionally, until sauce has thickened slightly, 1 1/2 to 2 hours.
  3. Add the basil.  Season with salt and pepper.  Store sauce in an airtight container, refrigerated, up to 4 days.  Store in freezer for up to 1 month.

Monday, January 3, 2011

Please bring an appetizer...(Recipe: Pesto Cream Cheese Spread)

"Please bring an appetizer..."  were the words that left my husbands lips as he re-read a holiday party evite...an hour before we were supposed to leave!  I had yet put on my party face, fed the Baking Toddler, packed my bag with toddler gear, or gotten dressed for that matter.  Of course I wasn't going to walk through the door empty handed so I had to act FAST.  Like make something in 5 minutes fast!

When I worked at Central Market, we would whip up a pesto cream cheese spread and serve it on our freshly baked breads.  It became so popular that our store would sell out of Tex-A-France pesto every time we served it.  You can choose your favorite pesto, it works well with all flavors.  It has become a staple at my parties and always seems to be a crowd pleaser wherever I take it.  And whats even better, you can make it in about (or less than) 5 minutes.

Pesto Cream Cheese Spread
Print Me!

1-16 oz. container Whipped Philadelphia Cream Cheese
1-7 oz. container Tex-A-France Sundried Tomato Pesto (you can use any-but this is my favorite)
  1. Place cream cheese and pesto in a bowl of a kitchen aide mixer and mix until incorporated.
  2. Pour spread into a serving bowl.  Serve with baguette slices.

Monday, October 4, 2010

A Sort of Philosophy and Creme Fraiche

Doing What I Do Best:  Baking For The Boys
A Sort of Philosophy
A few years ago my mom and I threw my sister a baby shower. We split the responsibilities and I happily took the post of menu planner/caterer (duh-that's my gig). So I sat down and worked up a menu, planned the table set up (my husband would divorce me if I used the term tablescape-he hates that term), beverages...you get the idea. Weeks before the shower my mom called and asked about the menu and I rattled off my ideas.

"What beverage?" she asked. "Oh, I was thinking of an easy punch called mock champagne, it was the most popular beverage we served at weddings when I catered." Silence. I could tell she wasn't buying it. Over the weeks she called a few more times with the same question, and I always had the same answer and she always had the same response.

Finally, the conversation changed and went a little something like this: "What beverage?" "Mock Champagne, take one bottle of Canada Dry and one bottle of any blend white grape juice and pour it a bowl. It is good. Very popular drink from that caterer I used to work for." "Oh, do you think people will like it?" I finally cracked, "Mom, do you really think I'd just put shit out on the table?" 

The point of this story is to share how I feel about this blog. I'm just not going to post mediocre recipes so I can fill my archive box to the max. If the food is good, I'll share, and if not...sorry it just won't make the cut.

I'm not here to make money either, not that there is anything wrong with that-I just don't want to worry over something that is essentially my hobby. I'm not here to become popular or to impress anyone either. Am I looking for a book deal?  No.  I'm just here to share good, quality, unpretentious, budget (most of the time) and family friendly food with folks...and maybe make a few new friends along the way.

DIY: Crème Fraiche
Now on to the recipe. Here is an easy and great recipe for crème fraiche. I have difficulty finding crème fraiche at my everyday grocery store. I knew exactly what aisle it was housed on when I worked for a specialty food store years back and I must admit, it was quite pricey. This recipe uses a bit of time and a few staple ingredients (I used left over ingredients from my son's birthday party)-that's it.
Crème Fraiche
I see creme fraiche caramel and creme fraiche based ice cream in the near future...

2 cups heavy cream
2 Tablespoons sour cream
• In a small bowl, combine the cream and sour cream, and mix well. Cover and let sit at room temperature overnight. Refrigerate until thickened.

Thursday, May 6, 2010

Lemon-Lime Curd

Lemon-Lime Curd and Blackberries drench over Buttermilk Poundcake
Happy Mother's Day! I love lemon (which I believe I stated before.) But this Lemon-Lime Curd is addictive. Not only is it easy to make, but it is extremely bright, summery, tart, sweet and delectable.

I have spooned it over gingerbread, drenched it over poundcake and created sunny citrus tarts using this shortbread pastry dough. Lemon-Lime Curd makes a great dip for berries as well. Or, you could just eat it straight from the jar out of the refrigerator, which I am very much guilty of!
Lemon-Lime Curd puddling down onto the plate.

Lemon-Lime Curd
• 2 lemons
• 2 limes
• 1 ½ cups sugar
• ¼ pound unsalted butter, room temperature
• 4 extra-large eggs
• ¼ cup lemon juice
• ¼ cup lime juice
• 1/8 teaspoon kosher salt

Directions
1. Zest the two lemons and one lime, being careful to avoid the white pith. Combine zest with sugar, rubbing with hands to incorporate.
2. Cream the butter and beat in the citrus sugar. Add the eggs, one at a time, and then add the lemon and lime juice and salt. Mix until combined (will look curdled).
3. Pour the mixture into a saucepan and cook over low heat until thickened, at about 170˚F, or just below a simmer. Remove from heat and cool or refrigerate.

Monday, February 1, 2010

Chocolate For My Pity Party

I'm back...I've been having a love/hate relationship (solely in my head) with this blog. The initial reason I started a food blog was to document (mostly images) of the food I make. I had an amazing portfolio a few years back and before we moved back home-it was deleted from our computer. Everything lost. A shot in the heart.

I began Baking For The Boys a little over a year ago while I was struggling with a colicky three month old-it kinda took my mind off of things. My writing and photos really suffered. I could tell in the writing-I had "Mommy Brain" and to tell of the truth, I was a moron. So I could honestly say that I've been happy with only a few (yes, a few) posts.

And just as I sat down and logged in today, I noticed that I had lost a follower. Ouch...Not that I'm taking it personal but is that the equivalent of being defriended on FB??? Just a question. I have a feeling this person has given up on the blogging world entirely. She hasn't posted in several months.

In this community where you can find thousands upon thousands of food blogs (many very much alike), the tiny and insignificant Baking For The Boys will still be trekking on. I have a new look (thanks to my sister-in-law) and still look forward to hearing from readers and making new friends along the way.

So...enough with this pity party! I need something to make me feel better...something like chocolate!!!
Chocolate Sauce
Yield: approx. 2 1/2 cups

1 cup water
1/2 cup sugar
1/2 cup light corn syrup
3/4 cup unsweetened cocoa powder
2 ounces semisweet chocolate chips

1. In a medium saucepan, whisk together the water, sugar, corn syrup, and cocoa powder.
2. Bring to a boil over medium heat. Once it's just begun to simmer and boil, remove from heat and stir in the chopped chocolate until melted.
3. Let the Chocolate Sauce stand for a few hours to thicken

Store in a covered container in the refrigerator for up to 10 days

Thursday, December 17, 2009

Tales of Cowboy Kringle & Cranberry Jelly

I had great plans for postings this month...like actually posting more than one post! Gee, what happened? I suppose I've been trimming the tree, making cookie dough to freeze (not baked yet), toying with an old family recipe, shopping and visiting Cowboy Kringle.

You heard me correctly, Cowboy Kringle. Not too far from my home, Cowboy Kringle sits atop bales of hay, looking mighty jolly wearing a cowboy hat, boots and red leather chaps. My little Eli had a wonderful first Christmas picture with him last year. This year...not so much.
I have been showing him images of Santa for weeks now, in effort of making him comfortable with his upcoming picture. I'd bellow out "Ho Ho Ho!!! Merry Christmas!" and he laughed every time. When we arrived to Cowboy Kringle's stable, he was very excited. I thought, oh yeah, this is going to work. Again, not so much.

The moment he was placed on the big red chaps...tears, crying, moaning! Which was fine with me. I actually love my sons "cry face." We chose the picture of Eli on the verge of crying-he somewhat resembles the "Stay Puff't Marshmallow Man."

Eli and Cowboy Kringle Christmas '08 (top); Christmas '09 (bottom)
After the picture torture, Cowboy Kringle belted out a big "HO HO HO! Merry Christmas!!!" Eli looked at me, jumped off of my lap and ran toward the big man in red, joining in another family's photo. WHAT!?!

OK, recipe time! This is my attempt to recreate a cranberry jelly that was given to me by a former neighbor. She was a personal chef for an Idaho senator and her jelly was the best I've ever tasted. Not only is it mighty tasty, but the beautiful color is as rosy as Cowboy Kringle's jolly cheeks!

Cranberry Jelly
makes approx. 7 cups

4 cups store bought 100% cranberry juice (I use Northland)
2 T. lemon juice
4 cups sugar
1 1/2 pouches of liquid pectin
  1. Put cranberry juice, lemon juice and sugar into a large stockpot. Bring to a rolling boil. Add liquid pectin; return to a rolling boil, and cook for 2 minutes.
  2. Immediately transfer jelly to sterilized jars and top with sterilized lids. Alternatively, transfer jelly to a large bowl set over an ice-water bath to cool; refrigerate in an airtight container up to one month.
  3. Process jars in pots of boiling water for 5 minutes. When canning in elevations over 1000 ft. sea level, please adjust processing time.
Its seems that every time I can, I need a refresher course. You can find canning guidelines here.

Monday, November 23, 2009

Kick The Can-Try Real Cranberry Sauce

Don't get me wrong, I have no qualms about canned cranberry sauce. It is tart, tangy, sweet, has a cool canned shaped appearance and such a wonderful squishy texture in your mouth. Don't get me wrong its pretty good but I love the real deal so much better.

So for those of you who are part of the canned coalition, I urge you to take 15 minutes out of your busy holiday schedule and make real cranberry sauce. It may become a holiday staple once you find out how simple it is.

Real Cranberry Sauce
originally posted 11.15.08 The Seven Million Wonders of The World
  • 1 (16-ounce) bag frozen cranberries, thawed
  • 2 oranges, juiced (enough for 1 cup of liquid) and 1 orange zested
  • 1/2 c.-1 c. light brown sugar (depends on how sweet you want it)
  • dash of salt
  • 1 cinnamon stick

Combine all of the ingredients in a saucepan and simmer until the cranberries just begin to burst, about 15 minutes. Transfer to serving dish and chill.