Friday, October 29, 2010

Spiced Beef Cornbread

 Halloween is by far my favorite holiday.  I think now, as an adult, it is because it is the kick off to the holiday season. As a child it was because my neighborhood knew how to give Halloween a proper celebration.  And it wasn't really the kids as much as it was the parents who led in the haunting of our East Texas neighborhood.  Freddie Kruger would hobble down the streets, Jason would quickly stumble down the path and the guy from Texas Chainsaw Massacre would chase you down the streets ripping his unchained chainsaw (I had never ran so fast!)

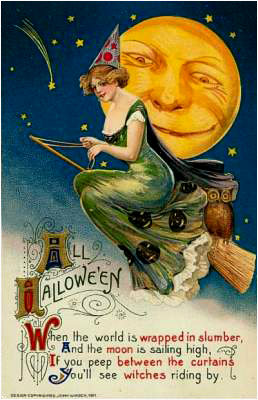
My dad, dressed in all black, red faced, donning a black wig and horns was a first class Lucifer.  He would jump out of the tree and startle trick or treaters, that is until one unfortunate Halloween when he threw his back out.

Even though our neighborhood Lucifer had been benched, my dad took on a new (and more brilliant) Halloween persona the next year.  "The Pumpkin Man" was dressed in flannel, overalls, work gloves and boots and had a gigantic pumpkin for a head.  He sat by our front door like a lump while my mom fussed with his clothes (mainly to make it look like she was stuffing him with hay-it was such a great act.)  

Parents would walk up to the door with their little ghosts or goblins and "Pumpkin Man" would move ever so slightly.  "Pumpkin Man" never really made any fast or sudden moves, he'd just creepily turn toward the crowd or brush up against a parent's arm.  That Halloween persona scared many people, kids and adults alike and a number of candy bags were left behind on our front porch.

One year after the debut of "Pumpkin Man," I was sitting in my 8th grade class listening to my fellow students talk of their Halloween plans.  Of course many planned to visit my neighborhood, even though they lived across town.  One boy blurted out, "I know one thing, that Pumpkin Man better not get me!"  Without looking at the boy I sat their smiling, amazed that he was remembered and known. All I could think was, yep, that's my dad!
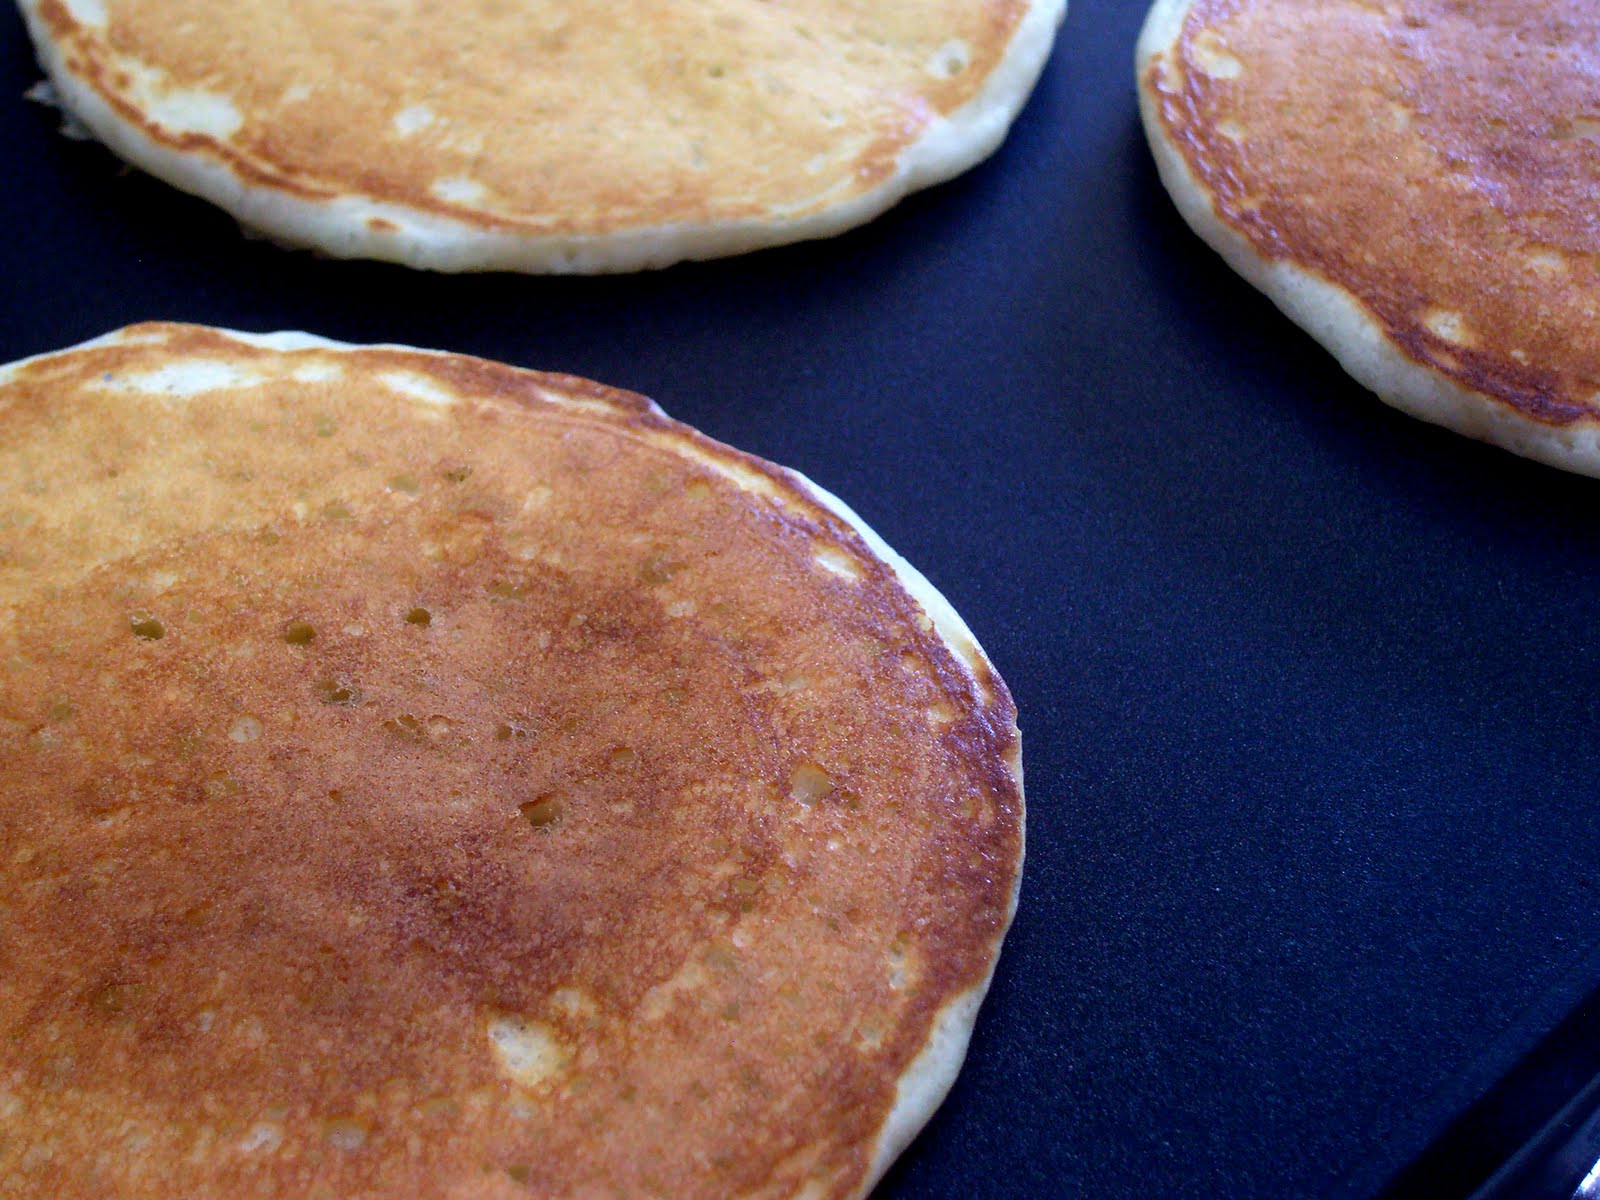
Spiced Beef Cornbread would be a perfect meal for Halloween night.  Not because it is spooky, but because it is easy, filling and good.  Whip this up in no time and send your trick or treaters out the door.  It has a nice warmth from the cinnamon (yes, cinnamon) and I love the cheesy cornbread topping.  Great dish for a fast, fall meal.

Spiced Beef Cornbread Cobbler
4 servings
adapted from Gourmet December 2006

1 medium onion, chopped
4 T. olive oil
2 garlic cloves, chopped
3 carrots, medium diced
1 pound ground beef or turkey
1 t. sugar
¼ t. ground cinnamon
½ t. cayenne
¼ t. ground allspice
¼ t. pepper
¾ t. ground ginger
1 ¼ t. salt, divided
14-15 oz. canned crushed tomatoes
2/3 c. yellow cornmeal
1/3 c. flour
1 t. baking powder
1/3 c. whole milk
1 large egg
2 oz. coarsely grated sharp cheddar (1/2 c. plus 2 T.)

1. Preheat oven to 400°F. Lightly oil a 9-½ inch pie/tart/casserole plate.
2. Cook onion in 2 tablespoons oil over medium heat, stirring occasionally, until translucent, 3-4 minutes. Add carrots and cook until soft. Add garlic, cook for 1 minute.
3. Add beef and cook, breaking up large chunks, until no longer pink. Add sugar, spices, and 1 teaspoon salt and cook, stirring until incorporated. Add tomatoes and briskly simmer, stirring occasionally, until liquid is reduced to about ¼ cup, 8-10 minutes.
4. While beef simmers, whisk together cornmeal, flour, baking powder, and remaining ¼ teaspoon salt in a medium bowl. Whisk together milk, egg, and remaining 2 tablespoons oil in a small bowl, then stir into cornmeal mixture until just combined. Fold in ½ cup cheese.
5. Spoon cooked spiced beef into pie plate with a slotted spoon. Spoon 4 mounds of cornbread batter over beef, then sprinkle remaining 2 tablespoons cheese over batter. Bake until a wooden toothpick inserted into center of cornbread comes out clean, 15-25 minutes. Serve warm.

Monday, October 18, 2010

Snickerdoodle Mini Muffins

The other day I saw a tee shirt advertised in a magazine that said, "Muffins are just ugly cupcakes."  For some reason I took offense to this, gasped, and quickly came to their defense "ARE NOT!"  Except, there was no one to argue this point with, the only other person in the room was BabyBoy, and there is not much talking coming from him!  Regardless, I found this statement to be wrong.

I love muffins.  They are so cozy and warm and I find myself "popping the top" much like Elaine had done on Seinfeld (except I eat the stumps too).  Similar to pancakes, the secret to a great muffin, besides using fresh ingredients, lies within the mixing.  Overmixing can produce a rubbery, rather than fluffy, texture.  And I suppose then, and only then could a muffin be called ugly!

Making Muffins, Step By Step
  1. For best results bring milk, eggs, and butter to room temperature.
  2. Whisk together dry ingredients in one bowl and wet ingredients in another.
  3. Make a well in center of dry ingredients.
  4. With a large rubber spatula, fold wet mixture into dry one, with few strokes as possible.
  5. Fill buttered muffin tins about three quarters of the way with batter.  This leaves enough room for a crumb topping and makes muffins that are the right size for snacking.

You're Not So Ugly Snickerdoodle Mini Muffins
yield 2 dozen
Print Me!!!

10 T. (1 ½ sticks) unsalted butter, melted, plus more for the pan
1 c. sugar
1T. plus 1t. ground cinnamon
1 ½ c. flour
2 t. baking powder
½ t. salt
½ c. buttermilk
1 large egg

1. Preheat oven to 375°F. Butter a mini-muffin tin, and set aside. In a small bowl, combine ½ cup sugar and 1 tablespoon cinnamon; set aside.
2. In a large bowl, combine flour, baking powder, salt, and remaining teaspoons cinnamon; whisk to combine.
3. In a separate small bowl, combine 6 tablespoons butter, remaining ½ cup sugar, buttermilk, and egg; whisk to combine.
4. Using large rubber spatula, fold butter mixture into flour mixture; use no more than 10 strokes. The mixture should be lumpy.
5. Spoon 1 tablespoon batter into each prepared cup, and bake until tops are nicely golden, about 8 minutes. Remove from oven; let cool in pan 10 minutes before transferring to rack to cool
6. Dip top of each muffin in remaining 4 tablespoons melted butter and roll in reserved cinnamon mixture. Serve warm or room temperature.

Monday, October 11, 2010

Dr. Pepper Peanut Brittle


I don't know why I think of Halloween every time I think of peanut brittle.  My grandmother made peanut brittle during the holidays and it always made its presence on the table at their annual Christmas Eve party, but I always think of it as a Halloween snack.  Maybe I should ask her if she made a batch during Halloween and the thought of it is trying to break through my subconscious.

This however, is not her recipe for brittle.  I started making Dr. Pepper Peanut Brittle when my husband was trying to kick the habit...of Dr. Pepper, I should say.  He was a serious addict.  One night he brought home a 3 liter bottle, yes, a 3 liter bottle of this stuff-it was gone in a day and a half.  I hate Dr. Pepper...so I know, and he knew who drank that whole bottle.  After me making some serious fun of him, and maybe a realization of a dependency, he decided to ween off of it.  He has been "clean" for several months now.  As a treat I make him this special little brittle.  It is so good and...addicting (OH NO!! What have I done???)

Dr. Pepper Peanut Brittle
Print Me!
1 ¼ c. sugar
¾ c. butter
1 ½ t. salt
¼ c. Dr. Pepper
2 c. lightly salted peanuts
½ t. baking soda

1. Line a rimmed baking sheet with pan sprayed foil.
2. Combine the first four ingredients in a saucepan and cook on medium heat bringing it to a boil, stirring often.
3. Once the temperature has reached 290°F on a candy thermometer, remove from heat and add peanuts. Stir. Add baking soda, and stir to combine.
4. Pour mixture onto foil lined baking sheet and cool until hardened. Break candy into shards.

Monday, October 4, 2010

A Sort of Philosophy and Creme Fraiche

Doing What I Do Best:  Baking For The Boys
A Sort of Philosophy
A few years ago my mom and I threw my sister a baby shower. We split the responsibilities and I happily took the post of menu planner/caterer (duh-that's my gig). So I sat down and worked up a menu, planned the table set up (my husband would divorce me if I used the term tablescape-he hates that term), beverages...you get the idea. Weeks before the shower my mom called and asked about the menu and I rattled off my ideas.

"What beverage?" she asked. "Oh, I was thinking of an easy punch called mock champagne, it was the most popular beverage we served at weddings when I catered." Silence. I could tell she wasn't buying it. Over the weeks she called a few more times with the same question, and I always had the same answer and she always had the same response.

Finally, the conversation changed and went a little something like this: "What beverage?" "Mock Champagne, take one bottle of Canada Dry and one bottle of any blend white grape juice and pour it a bowl. It is good. Very popular drink from that caterer I used to work for." "Oh, do you think people will like it?" I finally cracked, "Mom, do you really think I'd just put shit out on the table?" 

The point of this story is to share how I feel about this blog. I'm just not going to post mediocre recipes so I can fill my archive box to the max. If the food is good, I'll share, and if not...sorry it just won't make the cut.

I'm not here to make money either, not that there is anything wrong with that-I just don't want to worry over something that is essentially my hobby. I'm not here to become popular or to impress anyone either. Am I looking for a book deal?  No.  I'm just here to share good, quality, unpretentious, budget (most of the time) and family friendly food with folks...and maybe make a few new friends along the way.

DIY: Crème Fraiche
Now on to the recipe. Here is an easy and great recipe for crème fraiche. I have difficulty finding crème fraiche at my everyday grocery store. I knew exactly what aisle it was housed on when I worked for a specialty food store years back and I must admit, it was quite pricey. This recipe uses a bit of time and a few staple ingredients (I used left over ingredients from my son's birthday party)-that's it.
Crème Fraiche
I see creme fraiche caramel and creme fraiche based ice cream in the near future...

2 cups heavy cream
2 Tablespoons sour cream
• In a small bowl, combine the cream and sour cream, and mix well. Cover and let sit at room temperature overnight. Refrigerate until thickened.

Tuesday, September 21, 2010

Goodbye, Summer (Corn Fricassee)

Corn Fricassee
Today is the last day of summer and I must admit, I'm not really upset with her departure.  She was at most a tease at the beginning with her low to mid 90 temperatures, only to release her fury by August with triple digits.  So, I bid you adieu, you blazing hot season-I won't miss you!

I will admit though, that I'll miss sweet berries, juicy melons, and sweet, succulent, golden corn.  Corn's peak season, for the most part, is mid to late summer, but I guess it just all depends on where you live, right?

So, if you are enjoying a late summer corn harvest, please try this corn fricassee.  It was one of my favorite summer side dishes this season.  Sweet corn, enrobed in a creamy sauce, a salty bite from Parmesan=side dish from heaven folks!
Corn Fricassee makes a great accompaniment to braised pork chops; roasted broccoli also pictured

Corn Fricassee
Serves 4
Print Me!

6 ears corn (about 6 cups kernels)
4 T. unsalted butter
2 shallots, finely chopped
2 t. all purpose flour
1 cup chicken stock
1 cup heavy cream
½ t. salt, or more to taste
¼ t. pepper
2 T. roughly chopped fresh basil
1 oz. Parmesan cheese, grated, plus more for garnish

1. Using a chef’s knife, remove kernels from cobs into a bowl. Using dull side of knife, scrape milk and pulp from cobs; add to bowl.
2. Heat butter in a medium saucepan over medium heat. When melted and bubbling, add shallots. Cook, stirring, until soft and translucent.
3. Add corn kernels, corn milk, pulp, and flour. Cook, stirring, 1 minute. Stir in chicken stock. Turn heat to high; cook until liquid is reduced by half, about 3 minutes. Add cream; cook until mixture is thick and creamy, about 4 minutes more.
4. Remove from heat; stir in salt, pepper, basil, and cheese. Garnish with Parmesan.

Monday, September 6, 2010

The Key To A Light & Fluffy Pancake

Tiny Bubbles...
Lately, it seems that I have become a pancake aficionado of sorts. My son LOVES pancakes and I often make them once (or twice) a week. I have made all different kinds, pumpkin, whole wheat and his favorite, buttermilk. During my quest to make the perfect pancake, I have found these simple steps to be the key to tender, light, and fluffy pancakes.

It's All In The Mix
  • In a medium bowl, whisk together the dry ingredients to incorporate.
  • Mix the wet ingredients into the dry ingredients. Do not whisk the batter to a smooth uniform consistency-this can result in a tough pancake. Instead lightly mix the batter, leaving it lumpy. The reaction of liquid and the pockets of dry ingredients (lumps) result in fluffy, light pancakes-isn't food science cool!
Less Is More
  • The more melted butter there is in the pan does not necessarily mean the better the pancake. There is a good chance you'd end up with a "fried," crispy pancake exterior and an undercooked interior. Instead, rely on a thin film of butter coating the pan. I wipe the excess butter off of the griddle with a paper towel. This insures a pancake with even browning.
Flip It Good
  • It is best to flip the pancake when the batter surface is covered with tiny bubbles. The edges will bubble first and will begin to look a little dry. Avoid the temptation to flip until some of the interior bubbles have burst.
Get Creative
  • For fruit pancakes, place fruit on top of the batter after its been poured onto the griddle. That way, you'll have fruit evenly distributed throughout the pancake. Nut and granola toppings will lose their crunch if they sit in the batter too long-so sprinkle those just as you would the fruit.
Add Ins:
  • Sliced Bananas
  • Berries (strawberries, blueberries, blackberries)
  • Rum-soaked raisins
  • granola, pecans, walnuts
  • Apple & Cinnamon
  • Lemon Zest & Poppy Seeds
Basic Buttermilk Pancakes
Yields: nine 6-inch pancakes
Martha Stewart Living, January 2001
Print Me!
Ingredients
• 2 cups all-purpose flour
• 2 teaspoons baking powder
• 1 teaspoon baking soda
• 1/2 teaspoon salt
• 3 tablespoons sugar
• 2 large eggs, lightly beaten
• 3 cups buttermilk
• 4 tablespoons unsalted butter, melted, plus 1/2 teaspoon for griddle

Directions
1. Heat griddle to 375 degrees. Whisk together flour, baking powder, baking soda, salt, and sugar in a medium bowl. Add eggs, buttermilk, and 4 tablespoons butter; whisk to combine. Batter should have small to medium lumps.
2. Heat oven to 175 degrees. Test griddle by sprinkling a few drops of water on it. If water bounces and spatters off griddle, it is hot enough. Using a pastry brush, brush remaining 1/2 teaspoon of butter or reserved bacon fat onto griddle. Wipe off excess.
3. Using a 4-ounce ladle, about 1/2 cup, pour pancake batter, in pools 2 inches away from one other. When pancakes have bubbles on top and are slightly dry around edges, about 2 1/2 minutes, flip over. Cook until golden on bottom, about 1 minute.
4. Repeat with remaining batter, keeping finished pancakes on a heatproof plate in oven. Serve warm.

Monday, August 30, 2010

The Amazing Disappearing Rice Krispie Treat

If there is one sweet treat that seems to pull off the greatest of all disappearing acts it is the Rice Krispie® Treat. Seriously! I could set a decadent chocolate cake, fudgy brownies, a delicious fruit filled pie and Rice Krispie® treats out on a table and I guarantee the familiar cereal squares from childhood would be the first to go (and in record time, mind you).

What is it about this goody that sends kids and adults alike running toward the dessert buffet? Is it because it creates a feeling of nostalgia? Is it because of our secret adoration for Snap, Crackle and Pop? Or, is it because of the sweet, sticky, gooey concoction that holds the little puffed rice together? Whatever the reason (and I'm pretty sure it is a combination of all the above) they don't last very long around my house.

These treats are very simple to make and not too time consuming. I've used different cereal too, Cocoa Krispies®, Cocoa Puffs®, Fruit Loops®, Cap'n Crunch®...the list goes on... This recipe trends a little off of the original-they are a little bit more buttery and gooey!
Melissa's Cereal Treats
yield: 16 squares
Print Me!

7 cups mini marshmallows
5 Tablespoons Butter
1/2 t. salt
6 cups of puffed rice cereal (or any other crunch, puffed cereal)

1. Coat an 8x8-baking pan with nonstick spray. Line with a sheet of waxed paper, allowing for an overhang to allow you to lift the cereal treats out of the pan. Spray with nonstick spray.
2. Cook the marshmallows, butter and salt over medium-low heat, stirring frequently until smooth.
3. Remove from heat and stir cereal into the marshmallow mixture using a heat resistant, rubber spatula; mix thoroughly and fold the mixture bringing up marshmallows from the bottom of the pan.
4. Spoon in mixture. Coat hands with nonstick spray and press mixture firmly into the pan. Press into the corners of the pan and the top to smooth. Allow to cool.
5. Remove from pan by lifting the overhanging waxed paper ends. Cut into cubes.

Sunday, August 15, 2010

Outside-In Cheddar Sliders

Outside-In Cheddar Sliders on Mini Buns
Summer is finally coming to a close (you can thank me for stating the obvious later).  Teachers are back in their classrooms prepping for the upcoming year and parents are roaming the grocery aisles with school supply lists in hand.

As a kid I hated this time of year.  Whether it was the end of summer or the angst of beginning a new school year, I could have done without mid to late August.  And still I find myself not really being a fan of this time of year, though it is only because of the heat.  It is just too darn hot!

Like my new Weber kettle grill??? Bought it half price and already assembled (score!)
And speaking of hot...how about some girl on grill action (sorry for the pun.)  B4tB is getting a little meaty this month with these tiny burgers.  They are so cute and pretty darn good-and this is coming from someone who doesn't really eat beef.  Yes, I am from Texas and am not crazy about beef...I am an anomaly!

My accompaniments of choice: mustard, pickles and oven dried tomato-oh yeah!
Outside-In Cheddar Sliders on Mini Buns
Bon Appétit, July 2009
Yield: Makes 8

Ingredients
1 1/2 pounds ground chuck (20% fat)
4 1-inch cubes sharp cheddar cheese, each halved
Salt & Pepper
8 soft dinner rolls, split

1. Divide meat into 8 equal pieces (approx. 3oz. ea) Shape into balls.
2. Press 1 cheese piece into center of 1 meatball and enclose cheese in meat. Flatten to 21/2- to 3-inch-diameter patty. Repeat to form 7 more patties.
3. Sprinkle both sides of patties with salt and pepper.
4. Prepare barbecue (medium-high to high heat). Grill patties until cooked to desired doneness and cheese centers soften, about 5 minutes per side for medium.
5. If desired, grill cut side of rolls until toasted, about 1 minute. Transfer patties to rolls; let rest 5 minutes. Serve with your favorite burger accompaniments.
Print Me!